When the Playstation 2 was released by Sony in 2000, it would become the most sold videogame in the world, with 155 million units sold. The console marked a clear shift in the videogame market, when SEGA stopped creating hardware since the Dreamcast could not compete with the PS2. The sequel to the 1994 Playstation had several properties that made it popular, including a DVD-player and a large supply of games. In 2004 a slimmed variant of the Playstation 2 was released, making us refer to the “old” PS2 as “fat”. In time, these models as many other videogames, acquire problems with the hardware. Disc-based consoles might mean cheaper games, but the lifespan of both hard- and software is shorted than cartridge-based systems: lasers and motors tear. If you have a Playstation 2 fat with a “Disc Read Error”, then this guide is for you. Your PS2 might have problems reading DVDs, CDs (it is backwards compatible with the Playstation 1), or both. In this post I will show you how to clean the laser, and, if needed, replace it. To clean the laser you need a screwdriver, Q-tipz and some alcohol. For replacing it, you also need a solder iron.
Step 1: Open the Playstation 2 fat
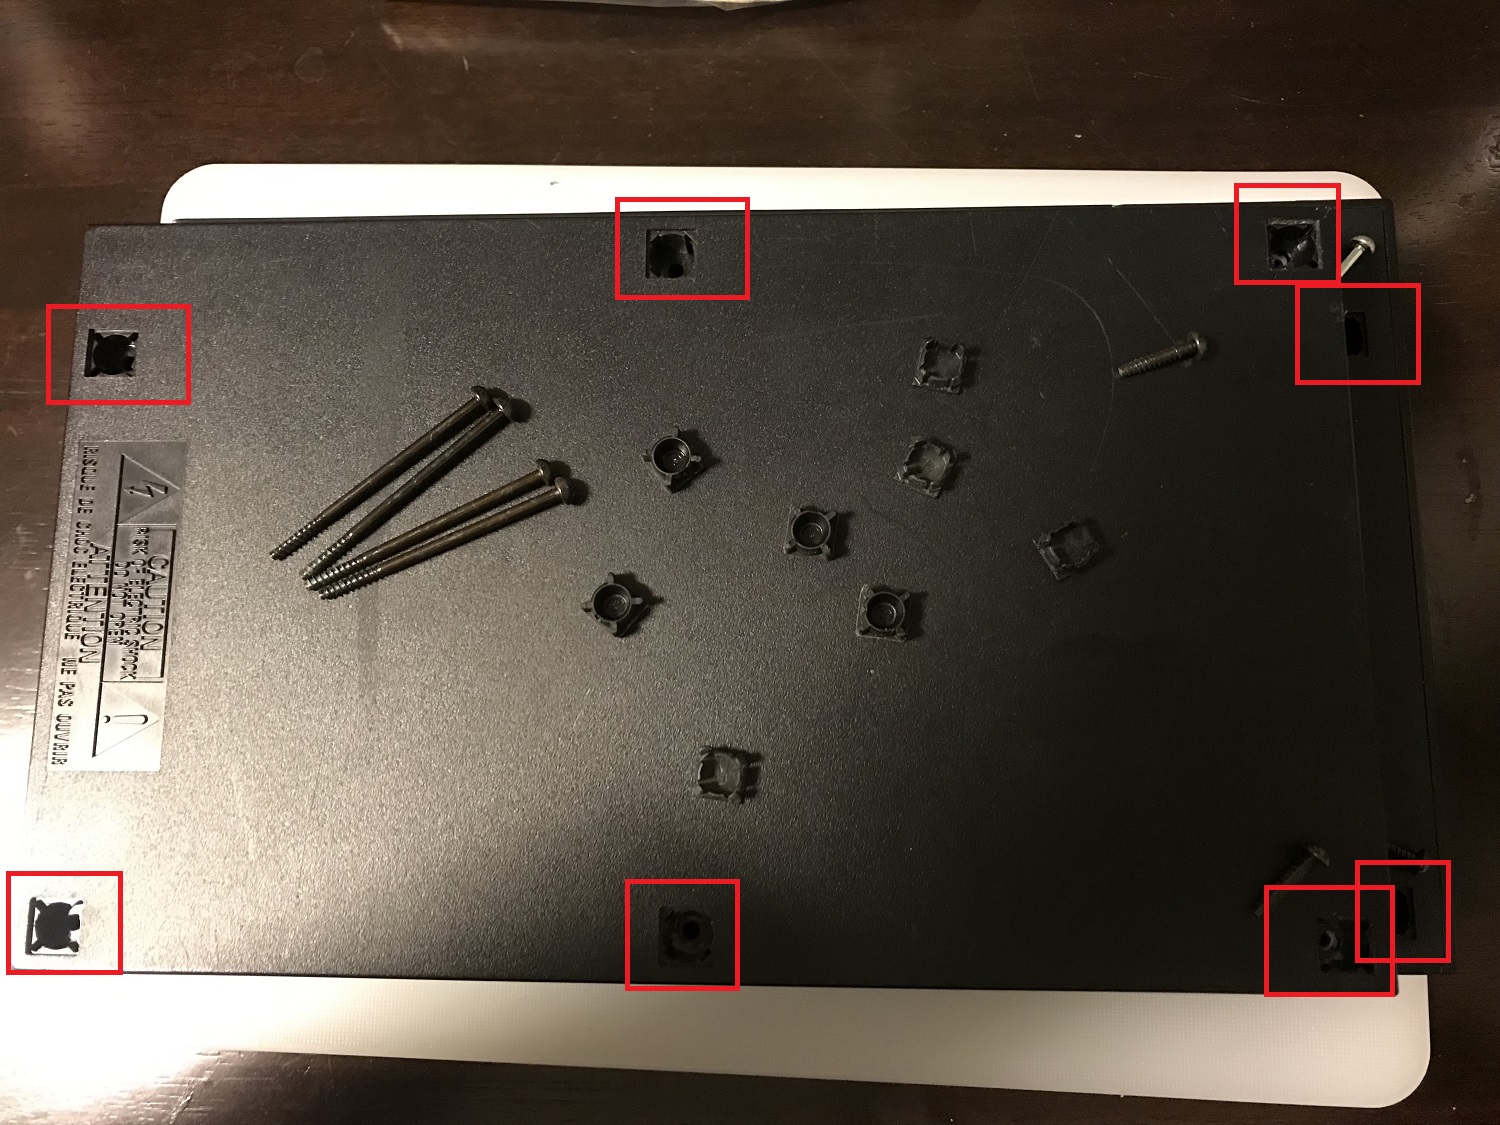
Below the Playstation 2 you will find eight plastic “squares” with screws below them. Remove the squares and unscrew the screws. You will find four long screws and four shorter. Then remove the top of the casing. If it is stuck, it is often due to the warranty sticker: remove it. The inside of the Playstation 2 depends a little on the model. If your unit has a flat cable between the casing and the on/off and eject-buttons, be careful not to damage it. On top of the DVD-drive you will find a rectangular black plastic piece. Unscrew the four (or sometimes two) screws to remove it.
Summary, step 1:
- Remove the squares and unscrew the eight screws
- Disattach the top casing
- Unscrew the four screws from the DVD-player


Step 2: Clean the Playstation 2 fat laser
The laser lens is marked in red below. Use isopropanol on a Qtip to clean it by gently rubbing it. With a little luck, this is the only step you need to perform for your Playstation 2 to read discs again. There is also a prism that you can access by lifting the black plastic piece on the laser. Sometimes it needs to be cleaned, but then you need to remove the laser (see instructions further down). Now is also a suitable time to clean the rest of your console, by using a mix of compressed air and alcohol.
Summary, step 2:
- Clean the laser lens with topz and isopropanol


Step 3: Replace the Playstation 2 fat laser
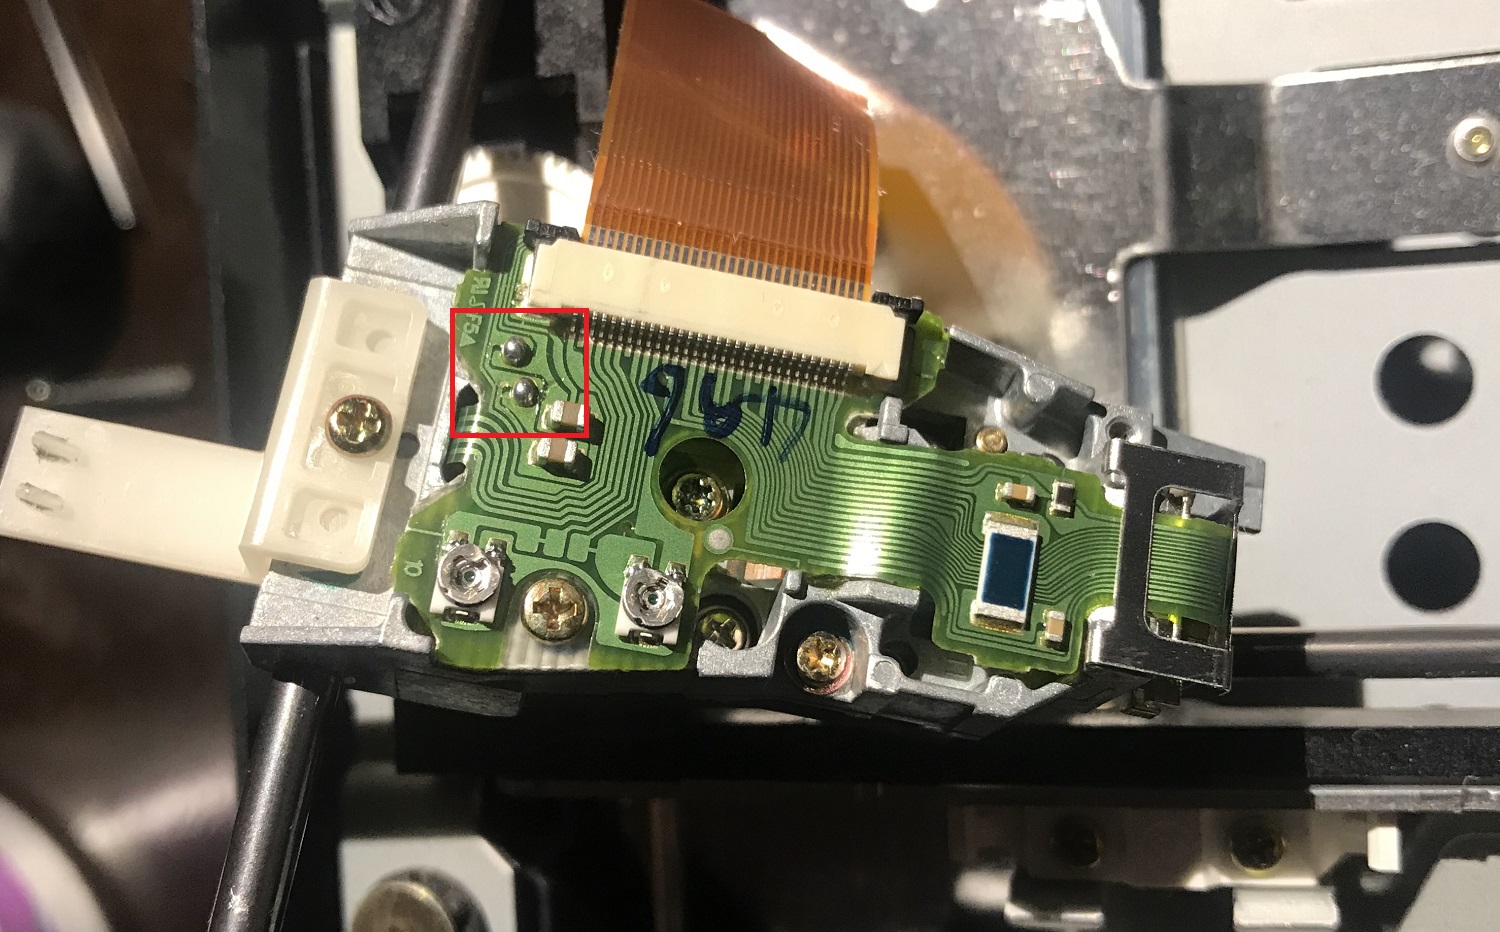
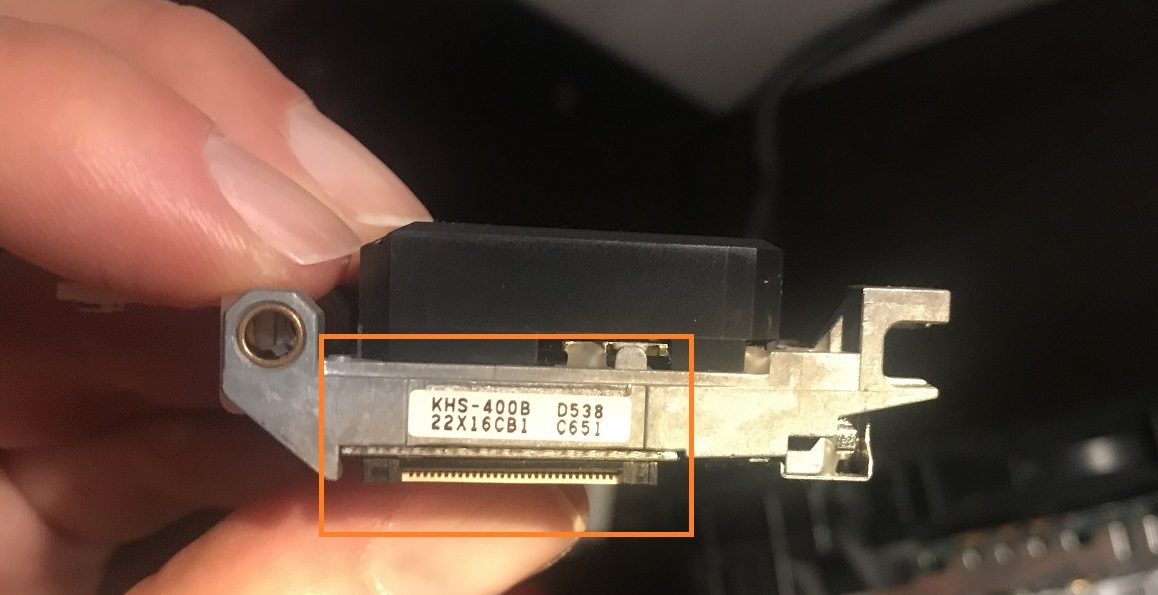
If you still experience Disc Read Errors, you may have to replace the laser. It can also be adjusted through two screws underneath the laser. This is a rather advanced procedure though, so I wont go through it in detail here (there are guides for this step on other sites though). Anyway, to replace the laser, connect the power to the Playstation 2, turn it on and eject the DVD-drive. Unscrew the black screw on one of the rails (marked below), and lift the laser unit. Disattach the ribbon cable by lifting the black hinge, and note what kind of laser it is. In our case, it was a KHS-400B. Now, the trouble is that there are several lasers, Sony original and third-party, out there. Several reports bear witness of problems with compability, and also that you might have to calibrate the height and position of the new laser. However, I found a laser of the exact same model and it worked fine. However, you need to de-solder two points on the replacement laser. I have no idea why. They are referred to as “anti-static solder points” on other sites and marked in the picture below. I just had to rub the solder iron lightly against them and did not even have to use a solder sucker. A word of advice though: be careful not to damage the thin green PCB.
Summary, step 3:
- Eject the DVD-drive with the case open.
- Unscrew the black screw from the rail.
- Remove the ribbon cable from the laser.
To mount the new laser:
- Remove the two solder points.
- Attach the ribbon cable.
- Attach the laser in the rail and secure the black screw again.
You can test the new laser while your unit is still open by inserting a disc, and manually hold the black “lid” over the drive. Hopefully you will get no more Disc Read Errors this time. If you successfully replaced the laser, now is a good time to put some silicon grease on the moving parts: rails and cogs.

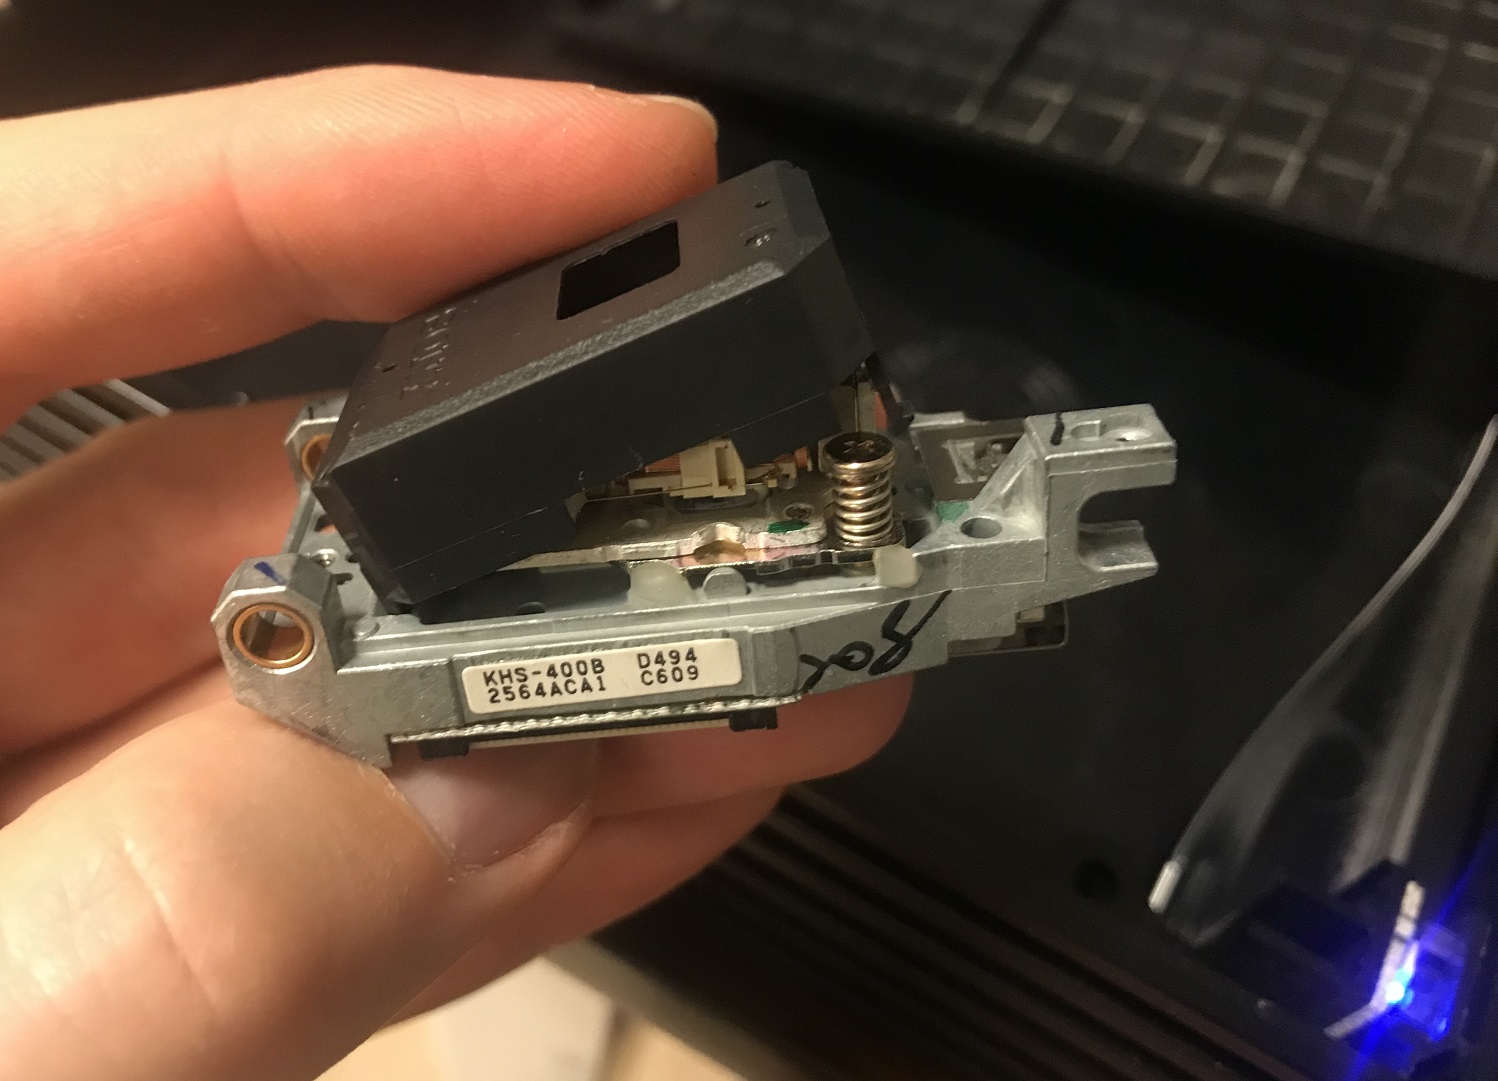

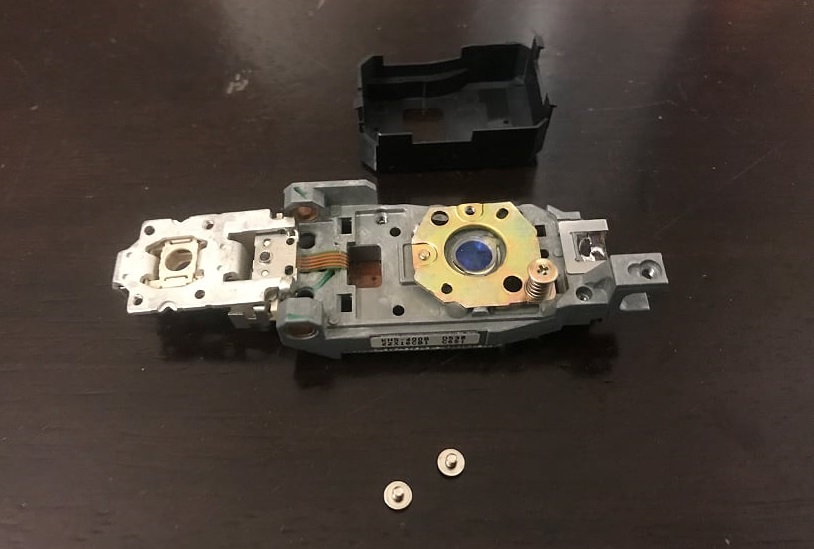
Note how the laser and disc motor behaves when turning on your Playstation 2: The laser moves to one edge, tries to focus and emits a red flash. Then, the motor should start spinning. If the laser does not detect a disc, the motor wont spin. The picture below shows a disassembled laser. In the picture at the bottom of this page, the screws for adjusting the CD and DVD part of the laser are marked.