In this post we will take a closer look on the inside of a Dreamcast controller. We bought a (dirty) controller on Swedish eBay that we cleaned while taking the pictures below. The Dreamcast controllers received mixed reviews: some love them, others hate them. The controller is constituted by a analog joystick, and a regular digital controller. Four buttons, one start button, and two “triggers” on the back. The cord is attached to the bottom of the gamepad and the top has room for two expansions, for example a Visual Memory Unit (VMU, which we look closer at in another post), and a rumble pack or an additional memory card.
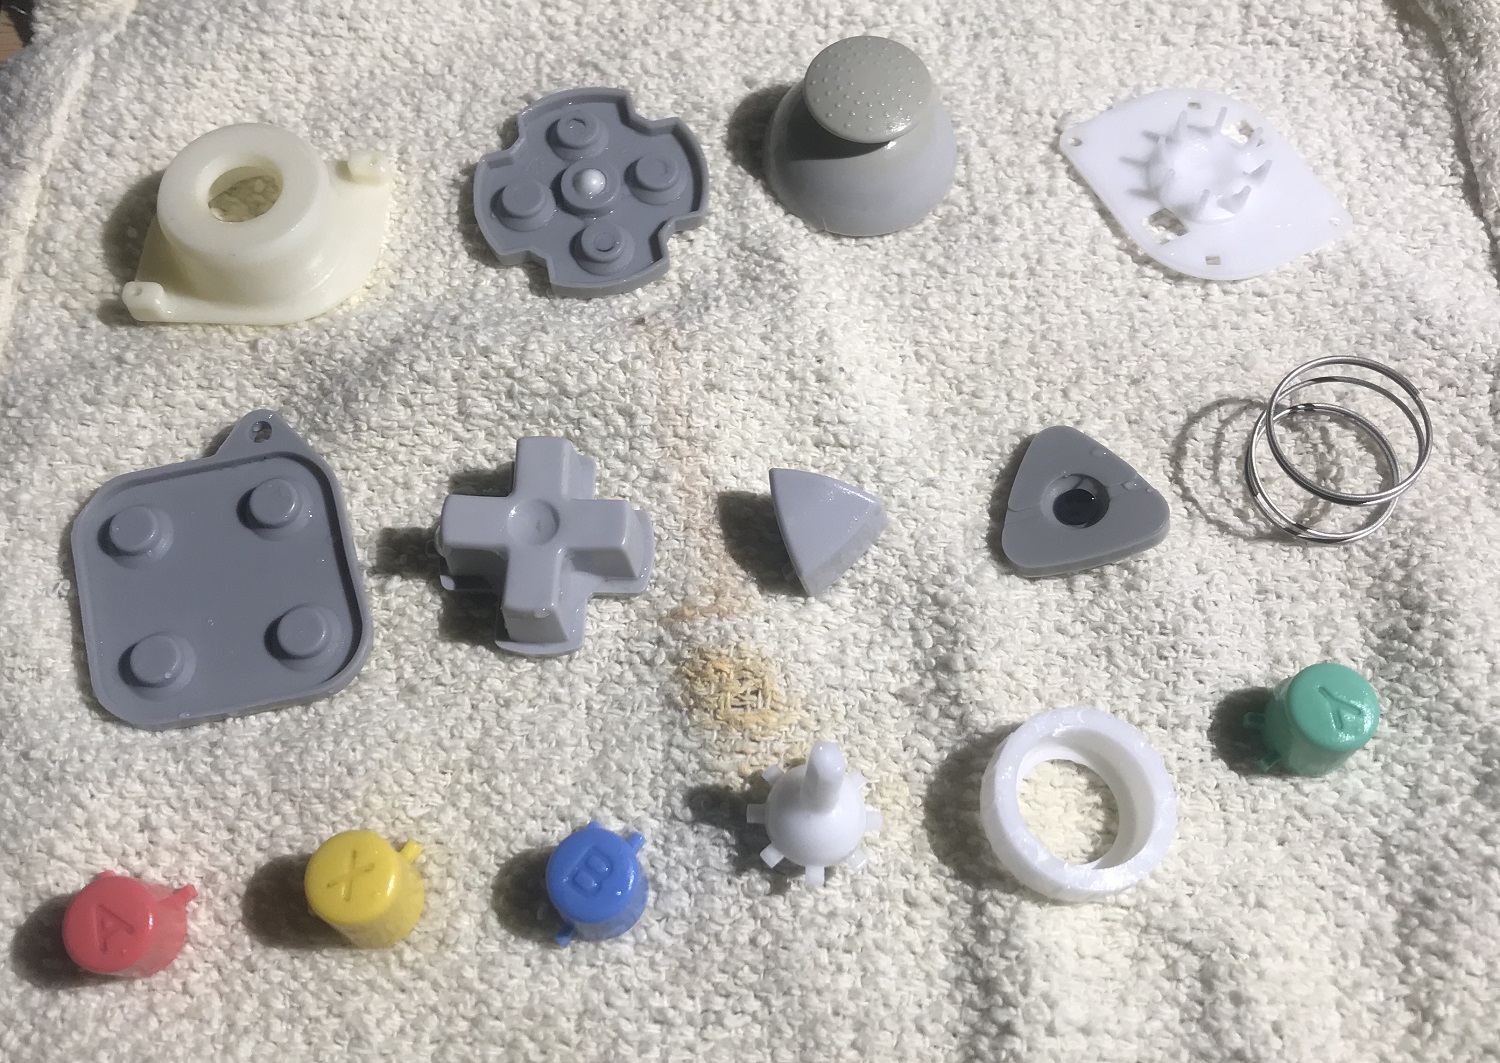
Dreamcast controller disassembled
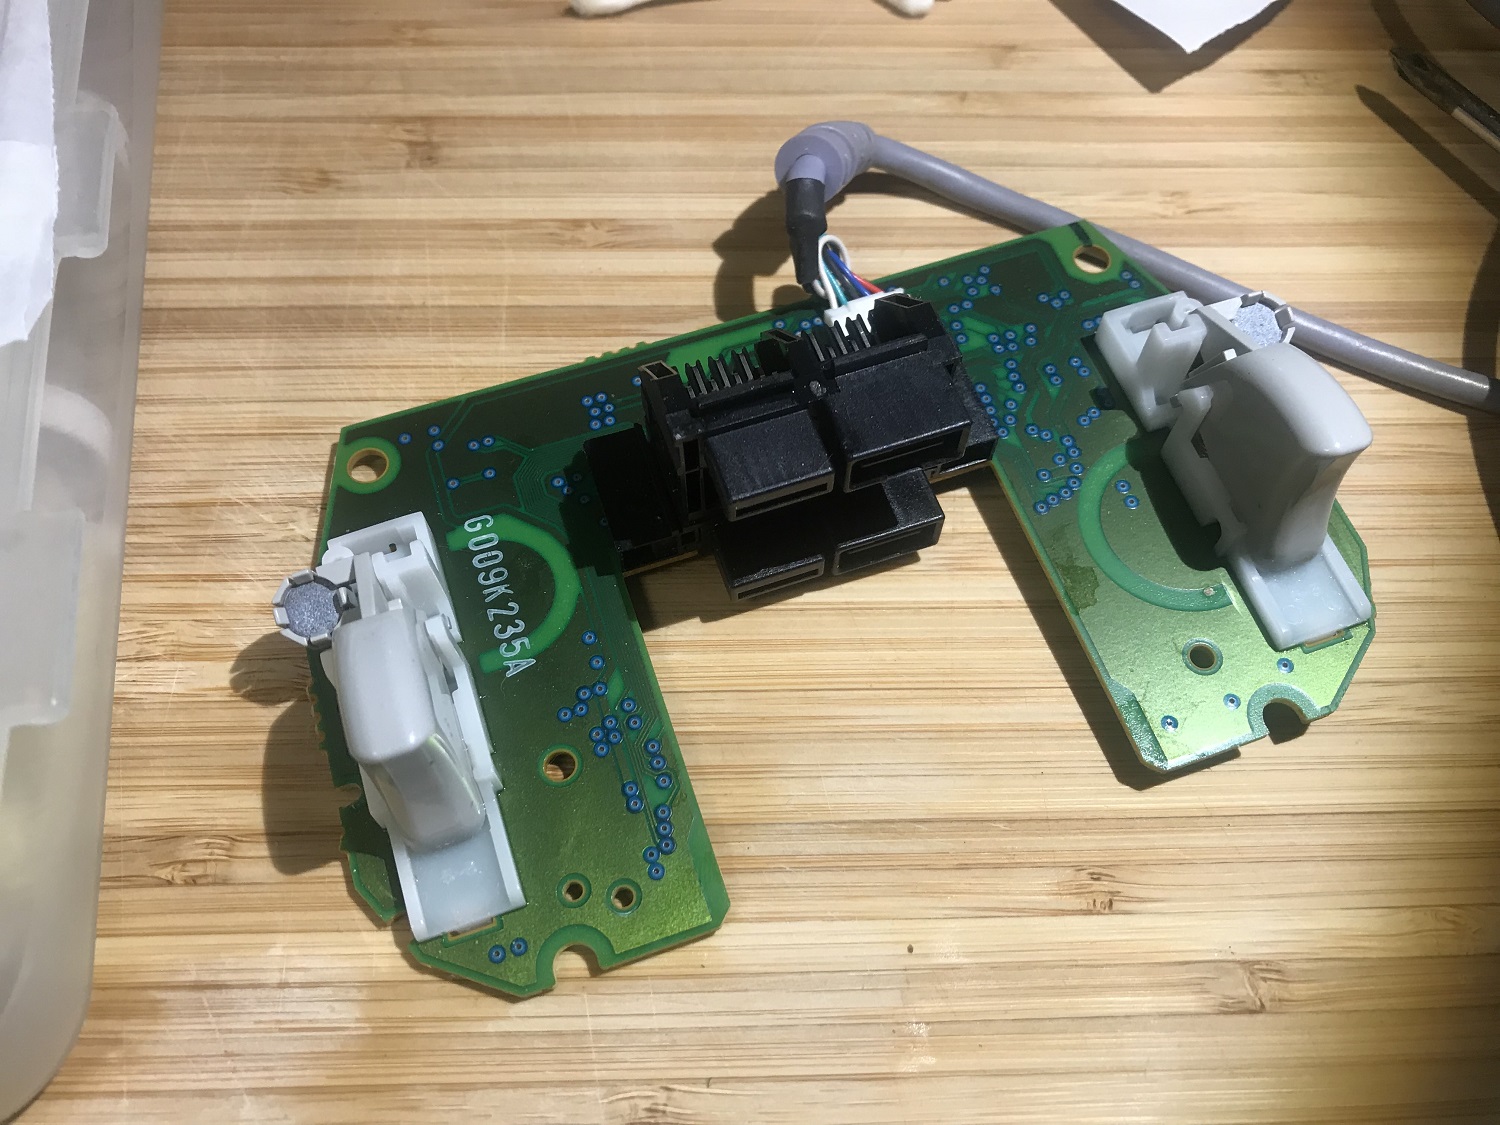
As seen in the picture below, our controller was pretty dirty. The outside can be cleaned with some isopropanol alcohol. To remove dust from the grooves we used the back of a needle, which was thin enough to fit, but not too sharp so the controller would be scratched. On the back of the controller there are six screws (marked in red in image #2). These can be removed with a regular Philips screwdriver. Four additional screws (two silver, two black) are found on the inside PCB. Remove these and you can disassemble the PCB and the buttons!


Cleaning the Dreamcast controller
As shown below, the rubber pads on this control is very dirty. We clean them and the buttons by bathing them in warm water and soap. For the PCB:s we use isopropanol alcohol. Now is also the time to check so the rubber pads are intact. If they have cracks you have to buy new ones, or replace them with parts from another controller. Sadly, “up” and “down” were broken on this controller, which means we have to find replacements. Notice the white plastic “ball” that resides in the middle of the digital controller: don’t loose it since it is vital for the controller to function!
The analog stick is very robust, especially compared to the sticks on the Playstation 2 which often get worn. You may put some silicon grease on it just for the sake for it, but it is probably not necessary (tips: don’t get silicon grease on the floor, it is very difficult to remove!). Be careful to notice how the analog stick is mounted when you disassemble it, to make assembling easier.


Also make sure to clean the back of the PCB, and the trigger buttons. Some contact spray on the expansion ports is never a bad idea!
Then it is time to assemble everything in reverse order. It can be a bit tricky to get all the rubber pads in place, but the procedure is pretty straight-forwards. Congratulations on a clean Dreamcast controller that will hopefully give you many years of gaming!

Thanks for the photos, I’m just modeling a controller with a board, and was looking for references
helped me clean out my new controller! thanks!