
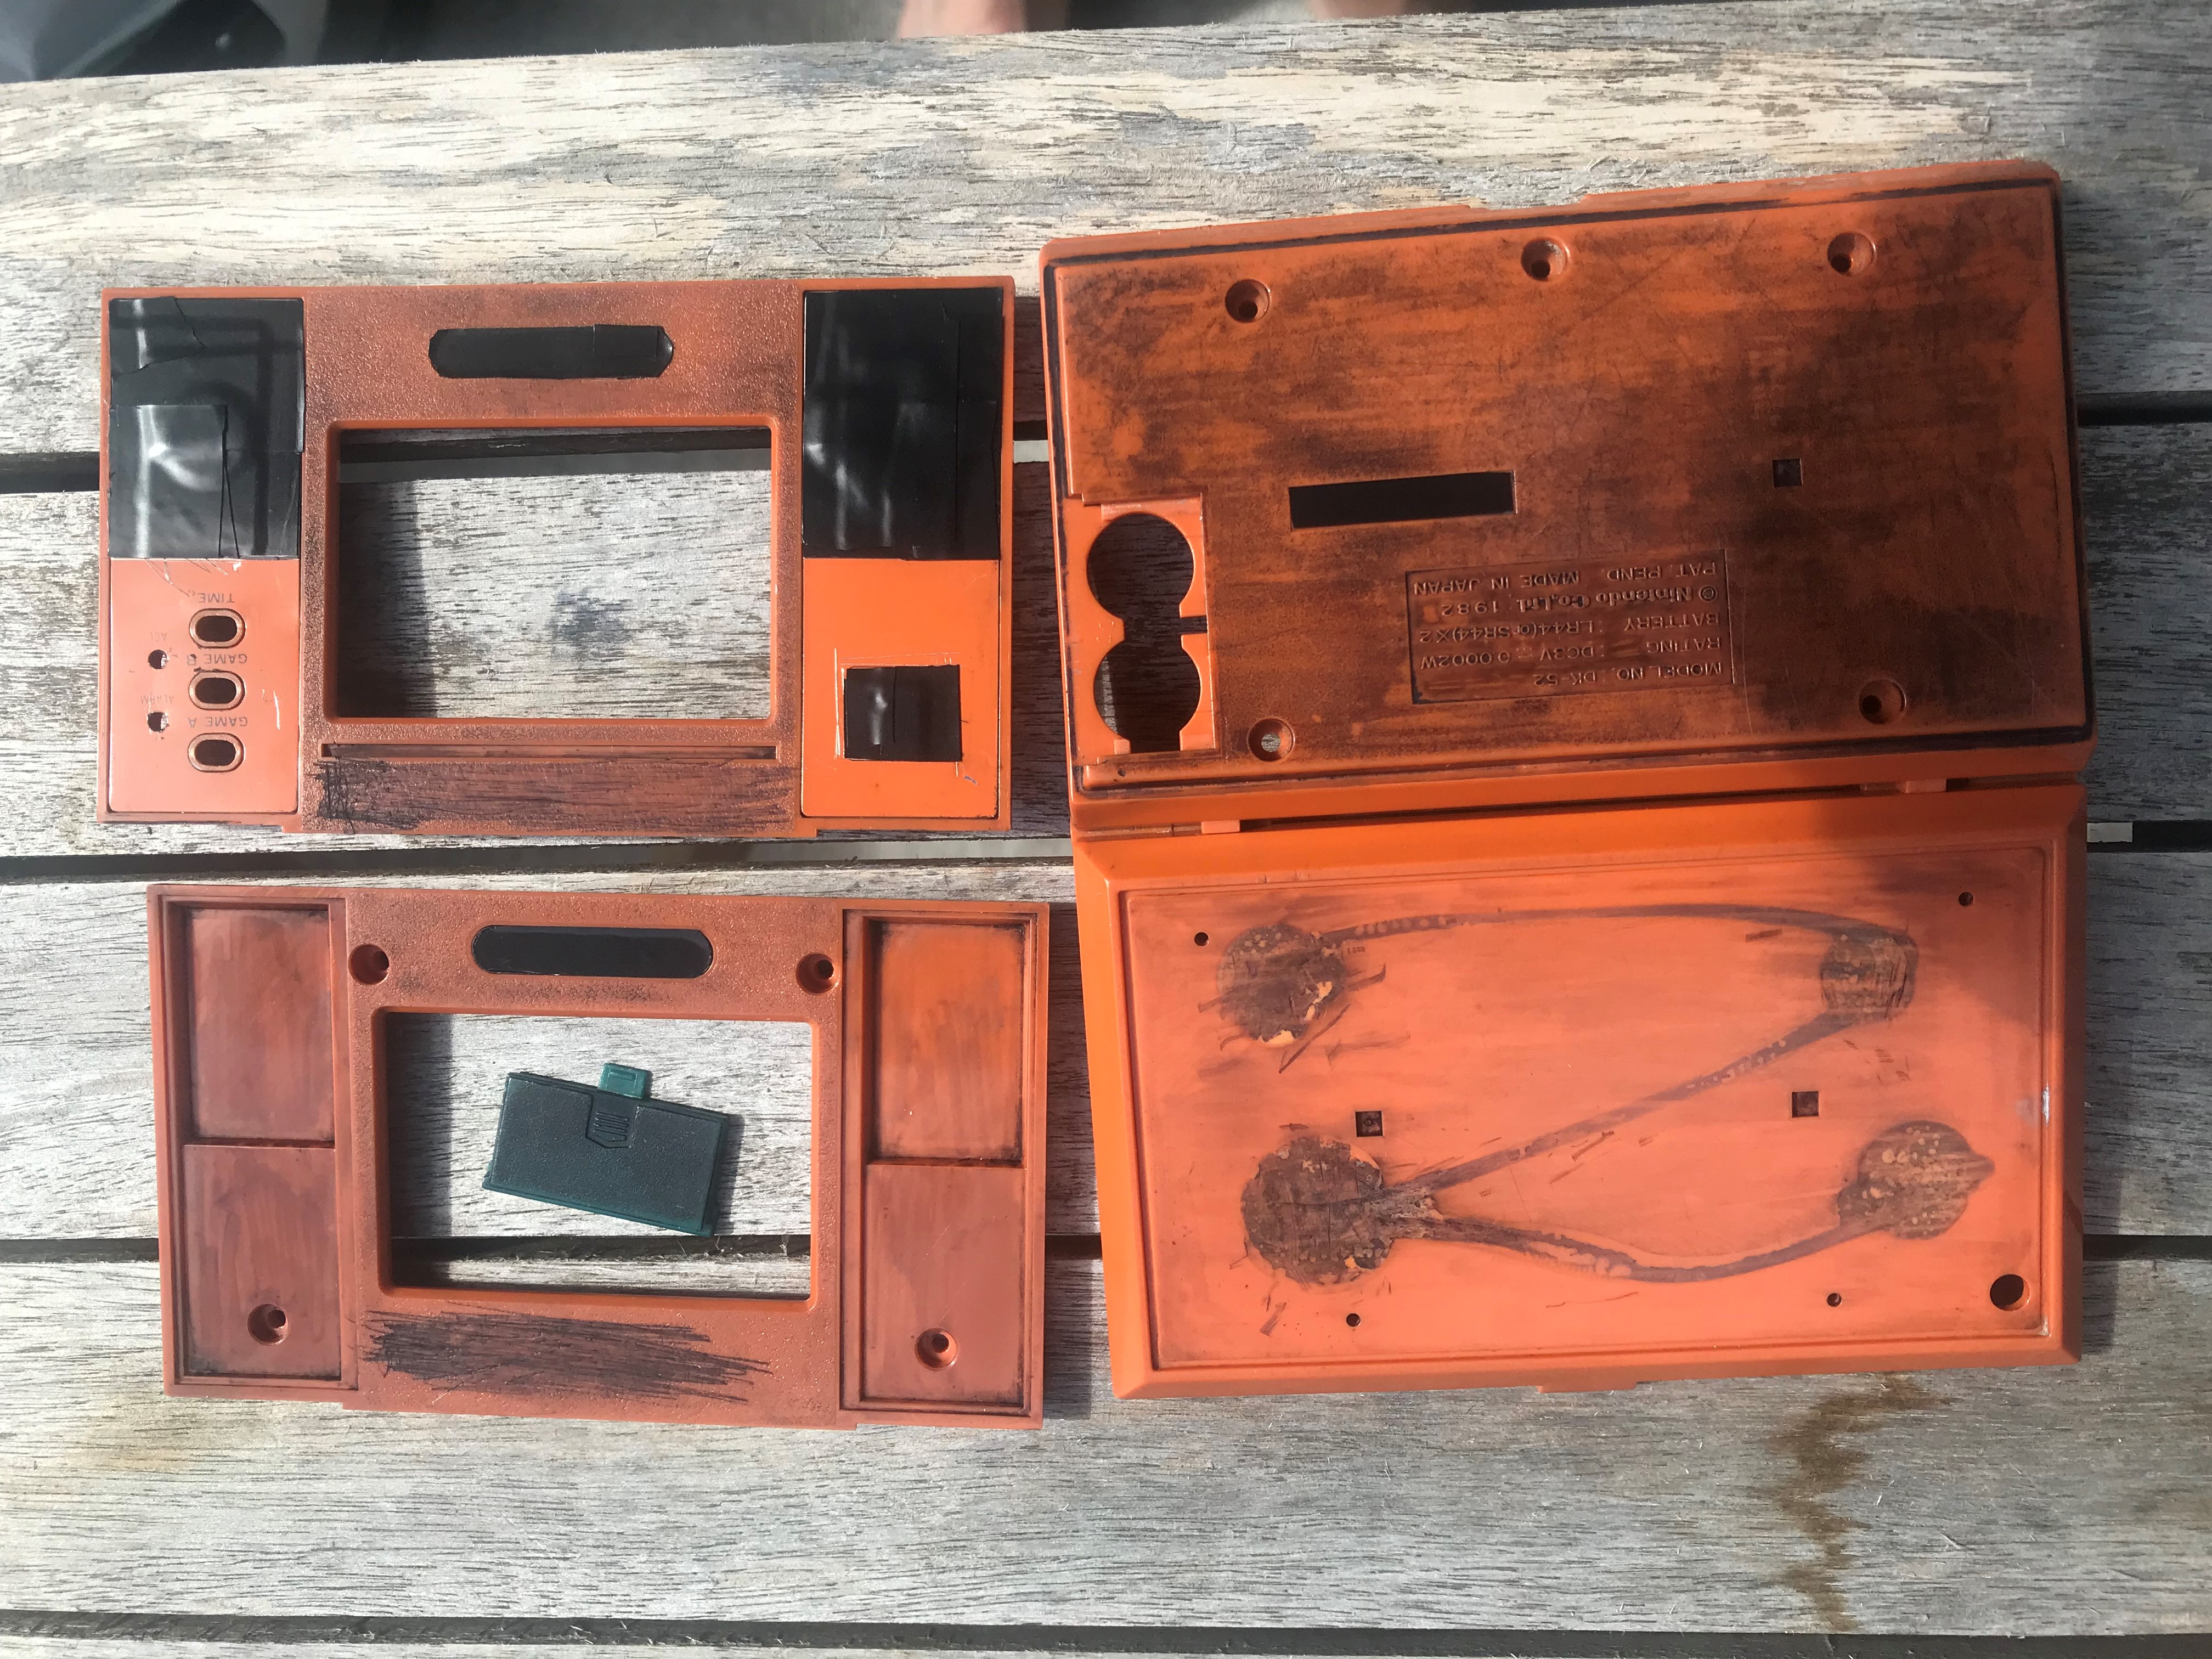
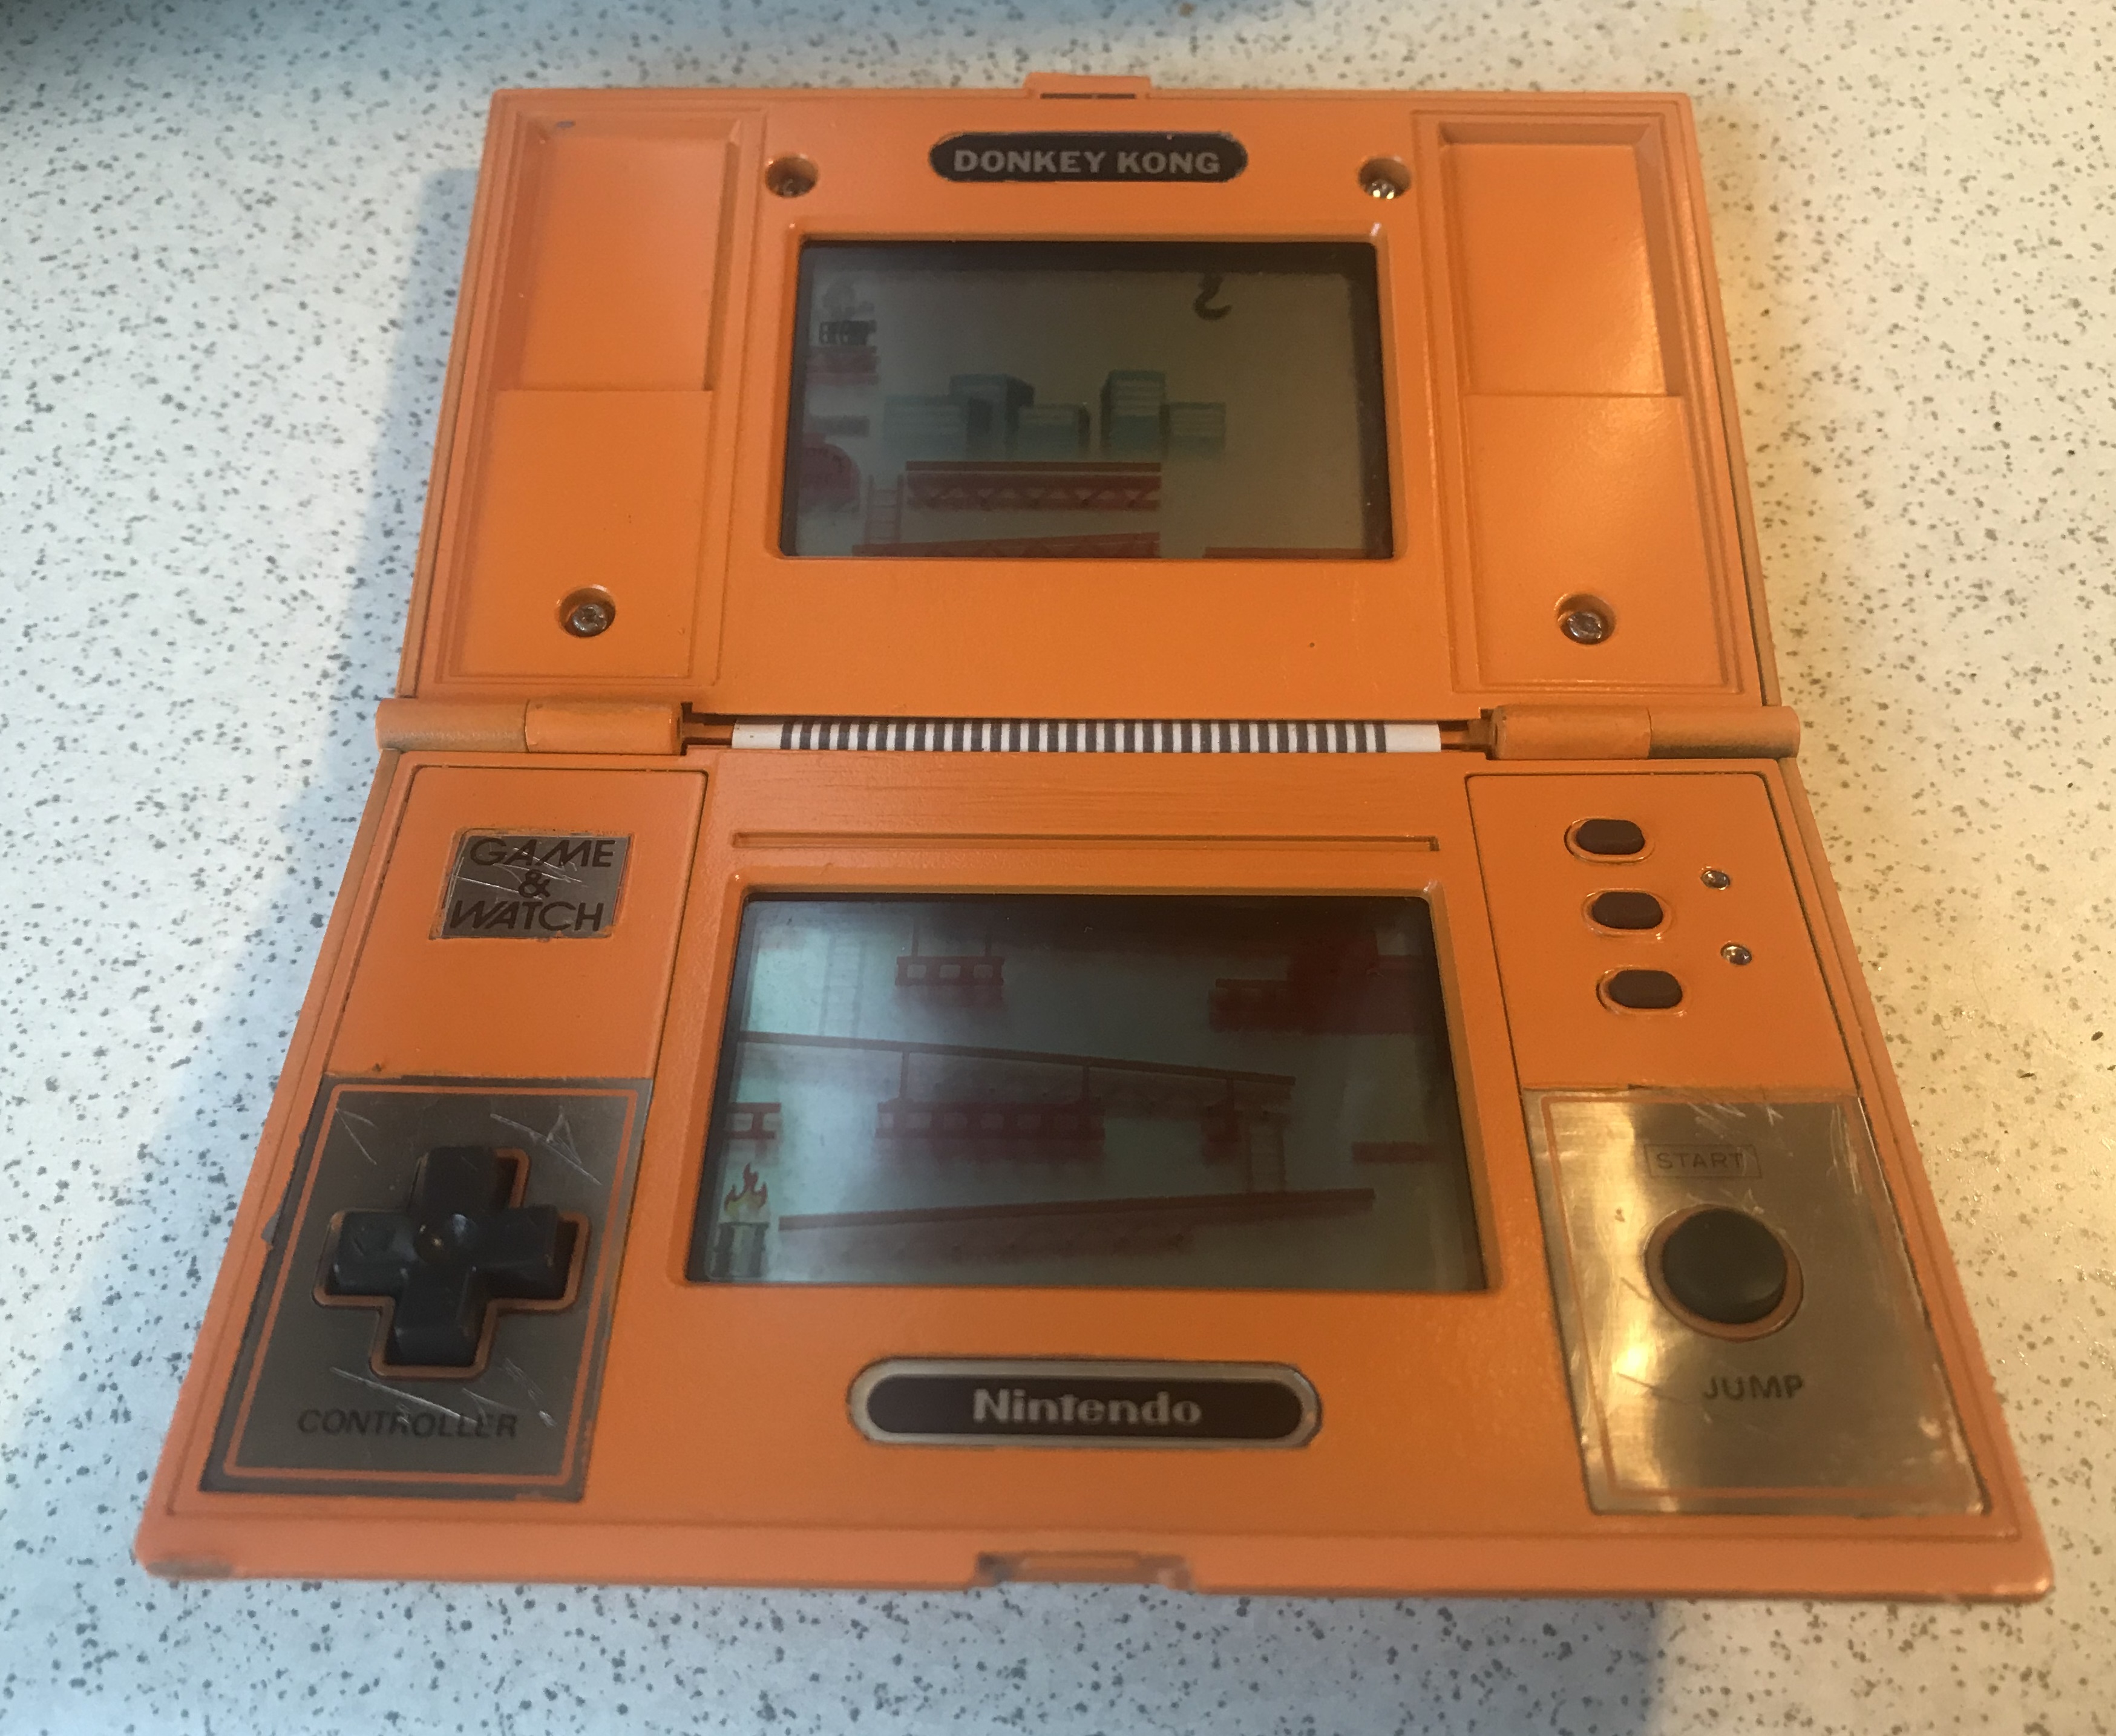
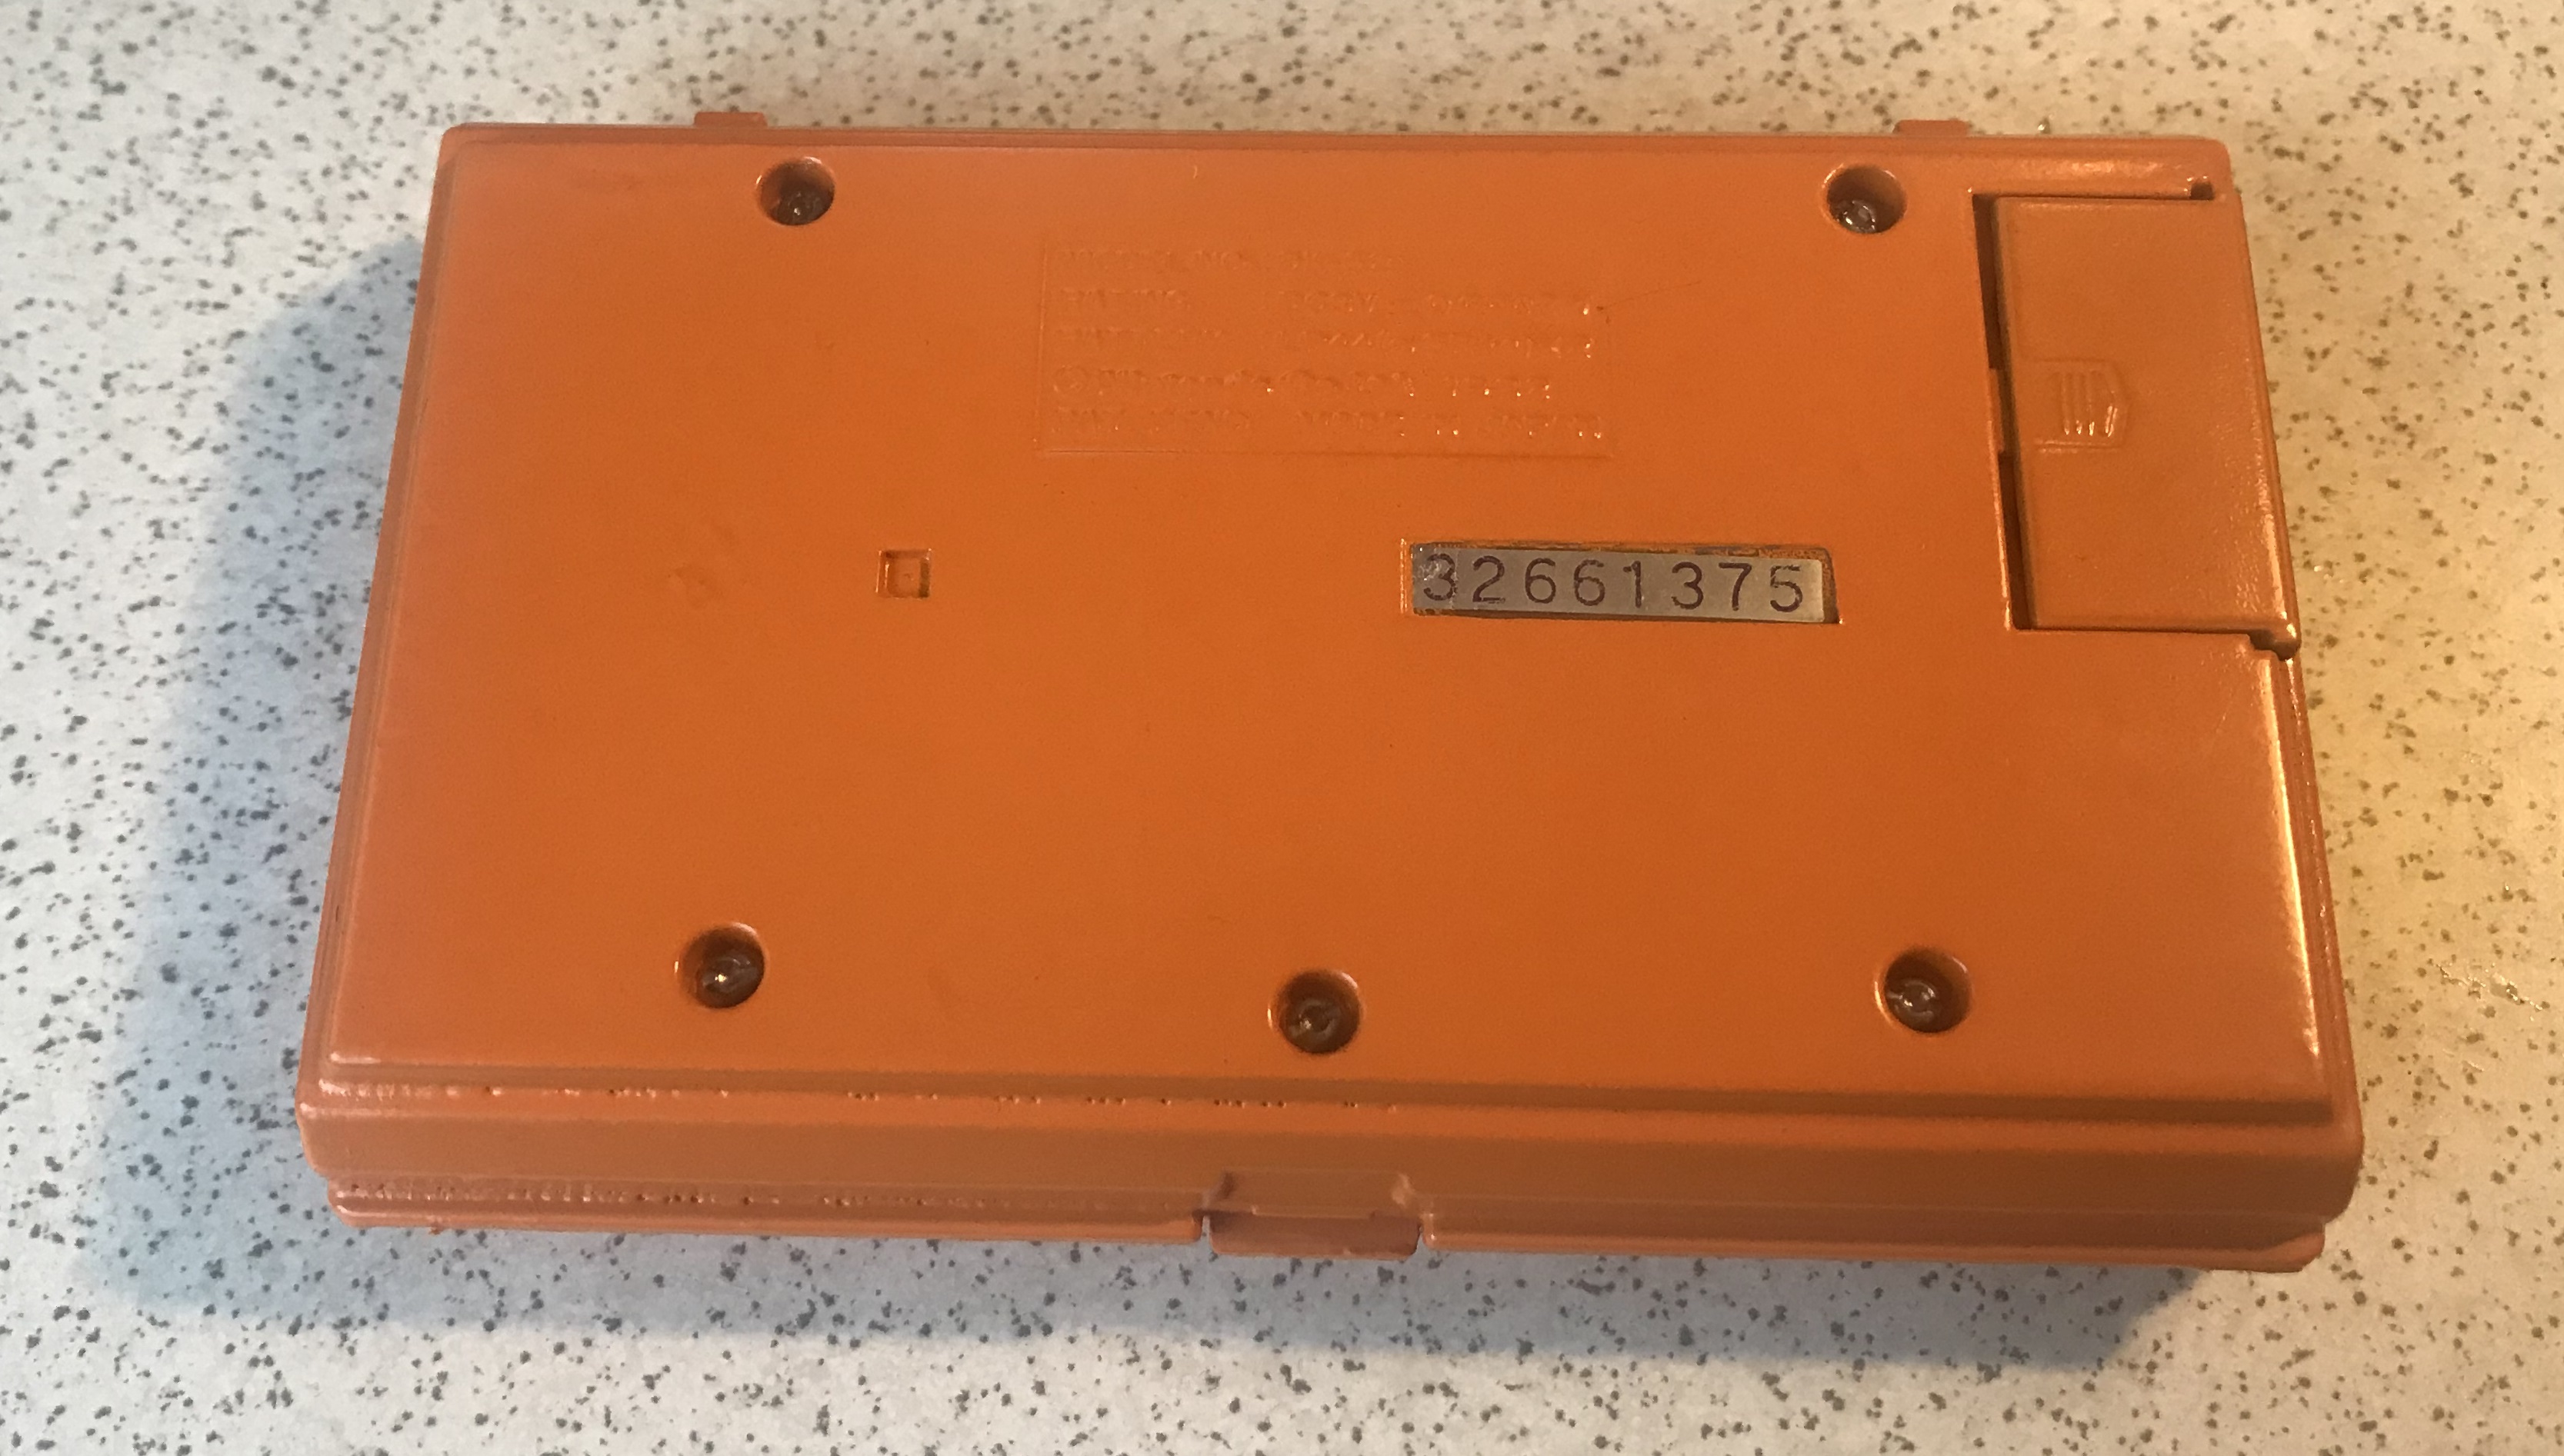
In this post I aim to refurbish a poor Game & Watch Donkey Kong that has been severly mistreated by a former owner. The classic handheld game from Nintendo was bought on Swedish Ebay together with two broken Gameboys, of which one is repaired (we will cover this in a later post). Anyway, the below pictures show the state of Donkey Kong when we recieved it:
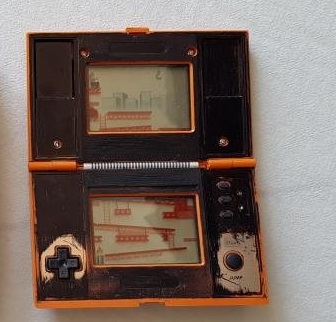
The game had the following flaws:
- Dirty
- Wrong battery cover (poor fit + wrong color)
- The plastic tag that keeps the game “shut” is broken
- Scratches
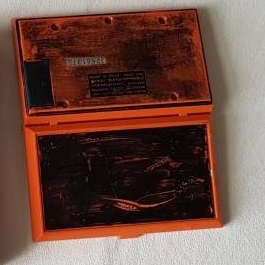
- Worst of all: Someone has ripped away the back sticker and painted with black paint all over the game!
Initially, I did not want to paint the game, so I tried to dip it in alcohol to remove the pain. Ethanol does not dissolve plastic, but might remove ink. We won’t go into detail of how to open the game in this post, but it involves removing 9 + 9 screws plus de-solder two speaker cables. Remember: Long screws = external, short screws = internal. A more detailed guide to dissasemble the Game & Watch can be found on this site.
Sadly, the ink was heavily merged into the plastic, especially in the parts with rough surfaces. The result from the cleaning was not great, although the difference from the prior state was notable.

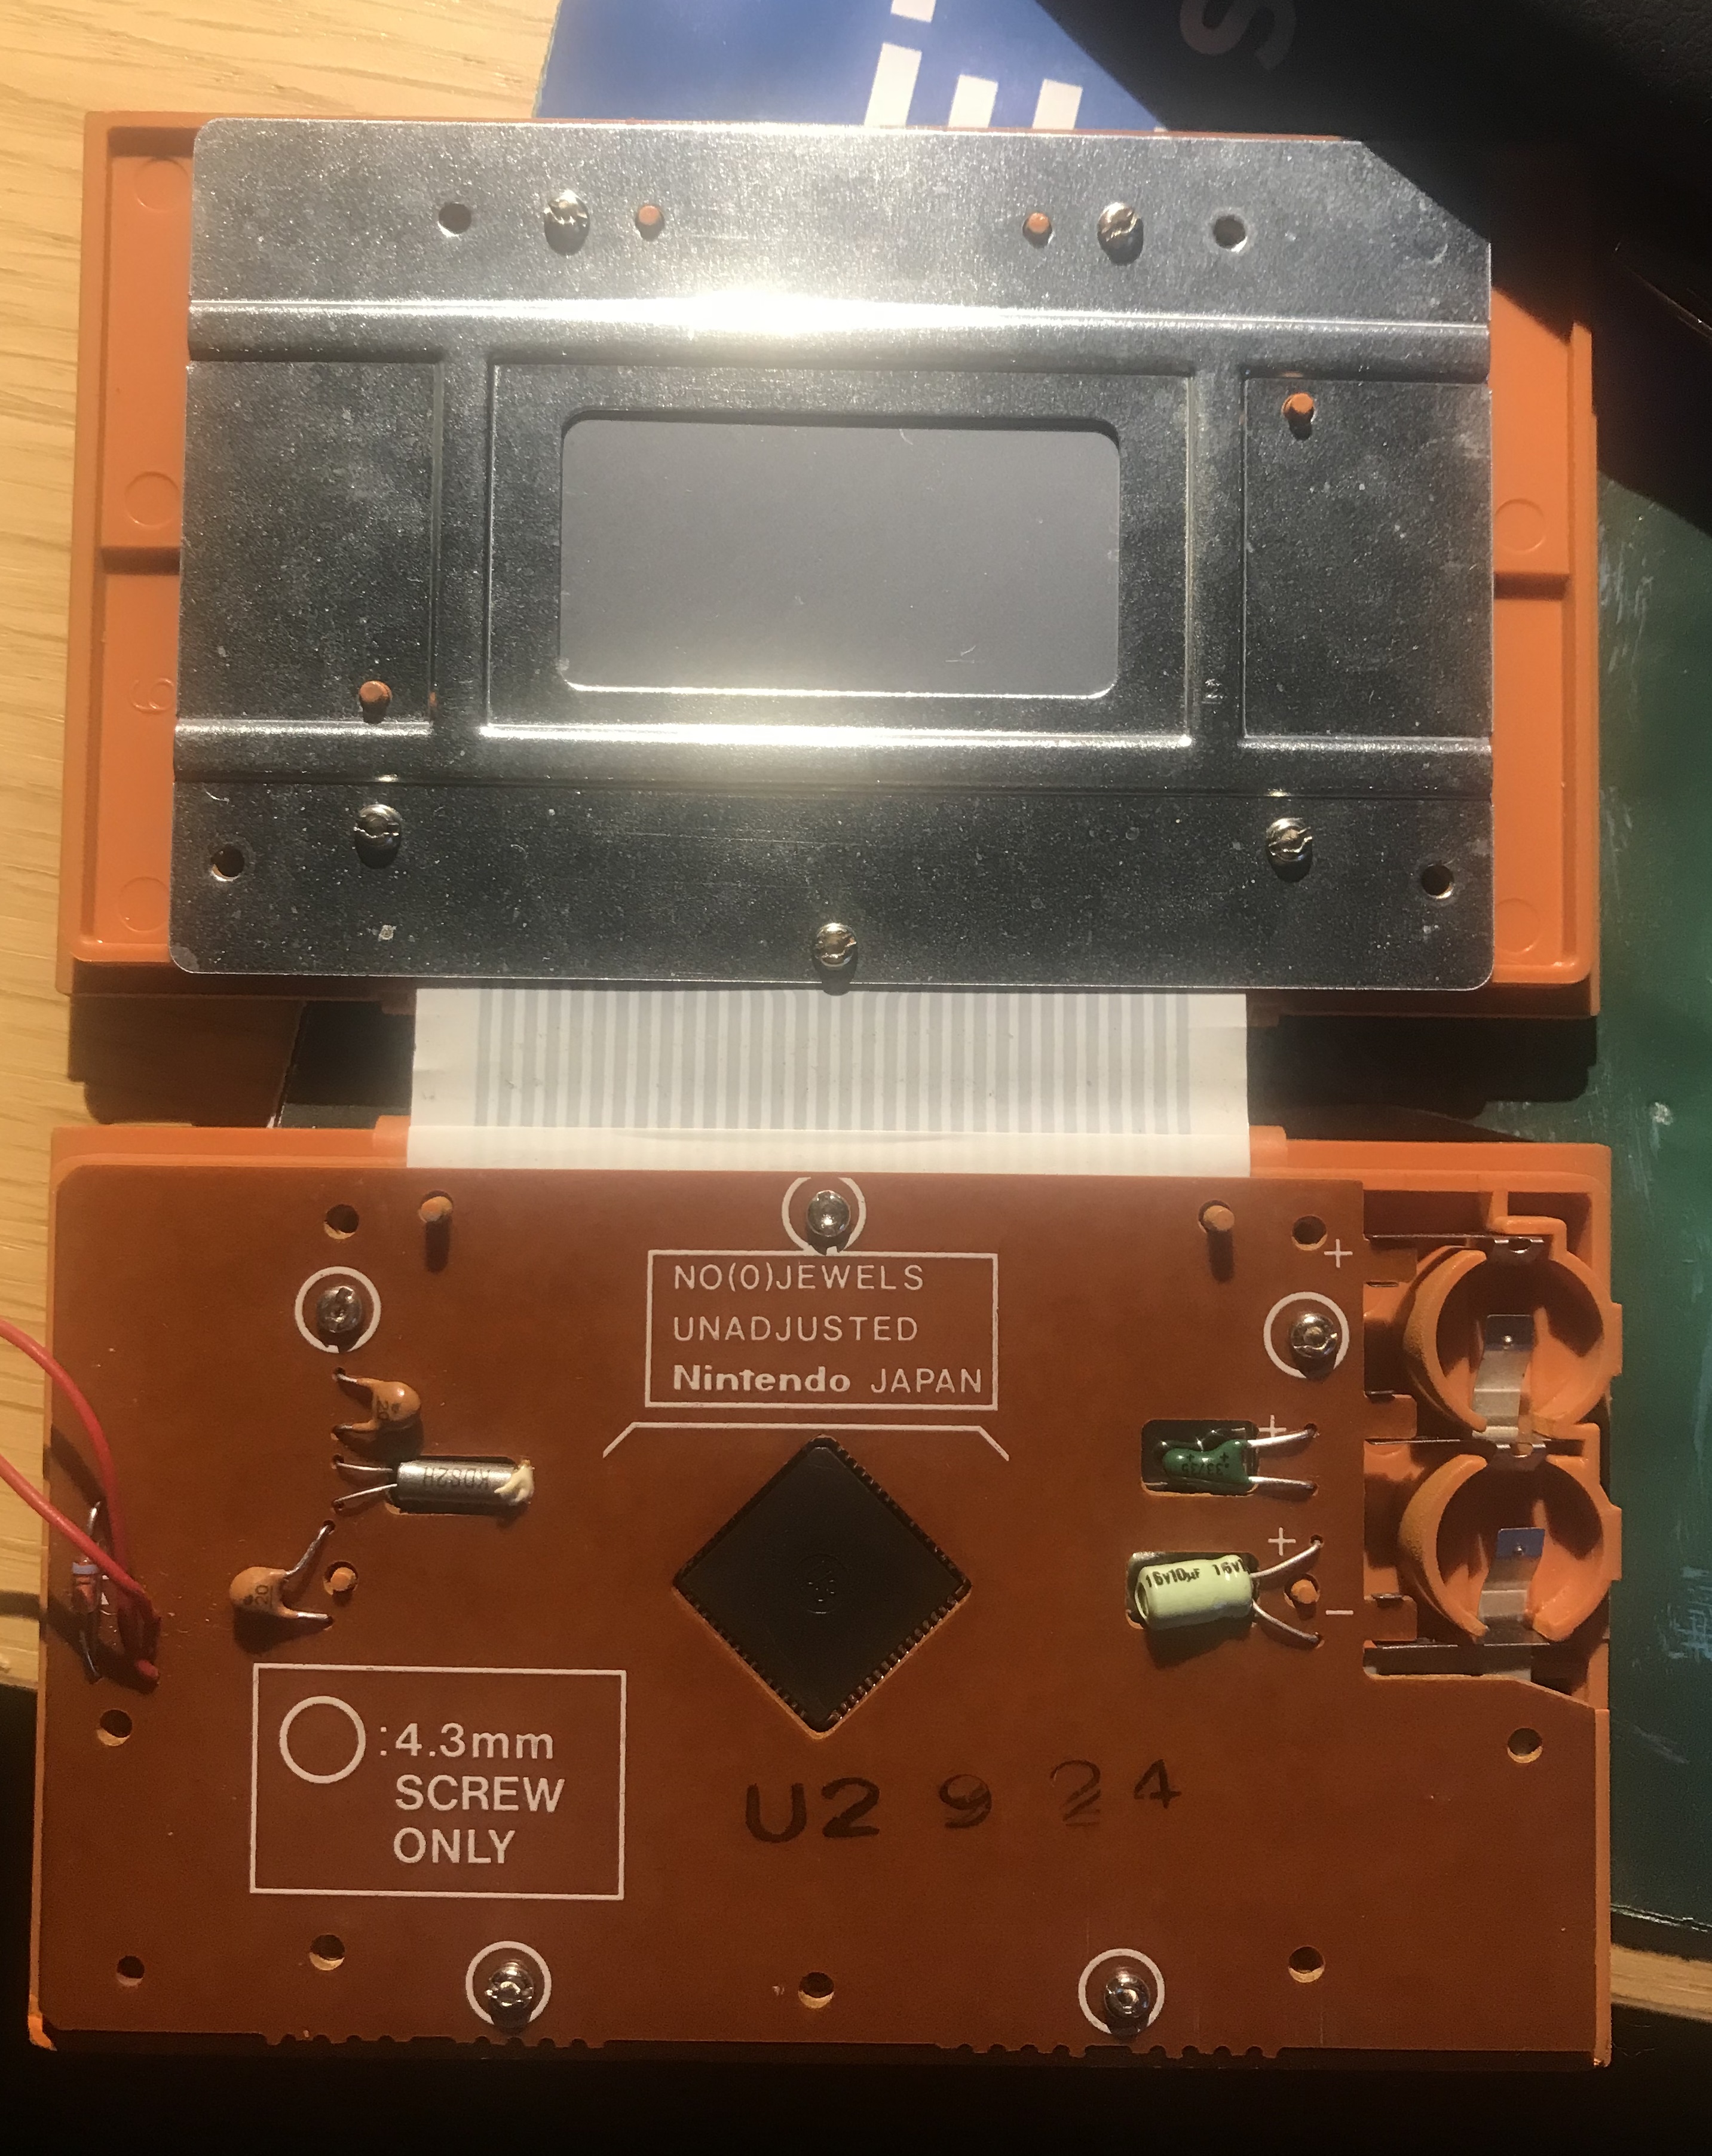
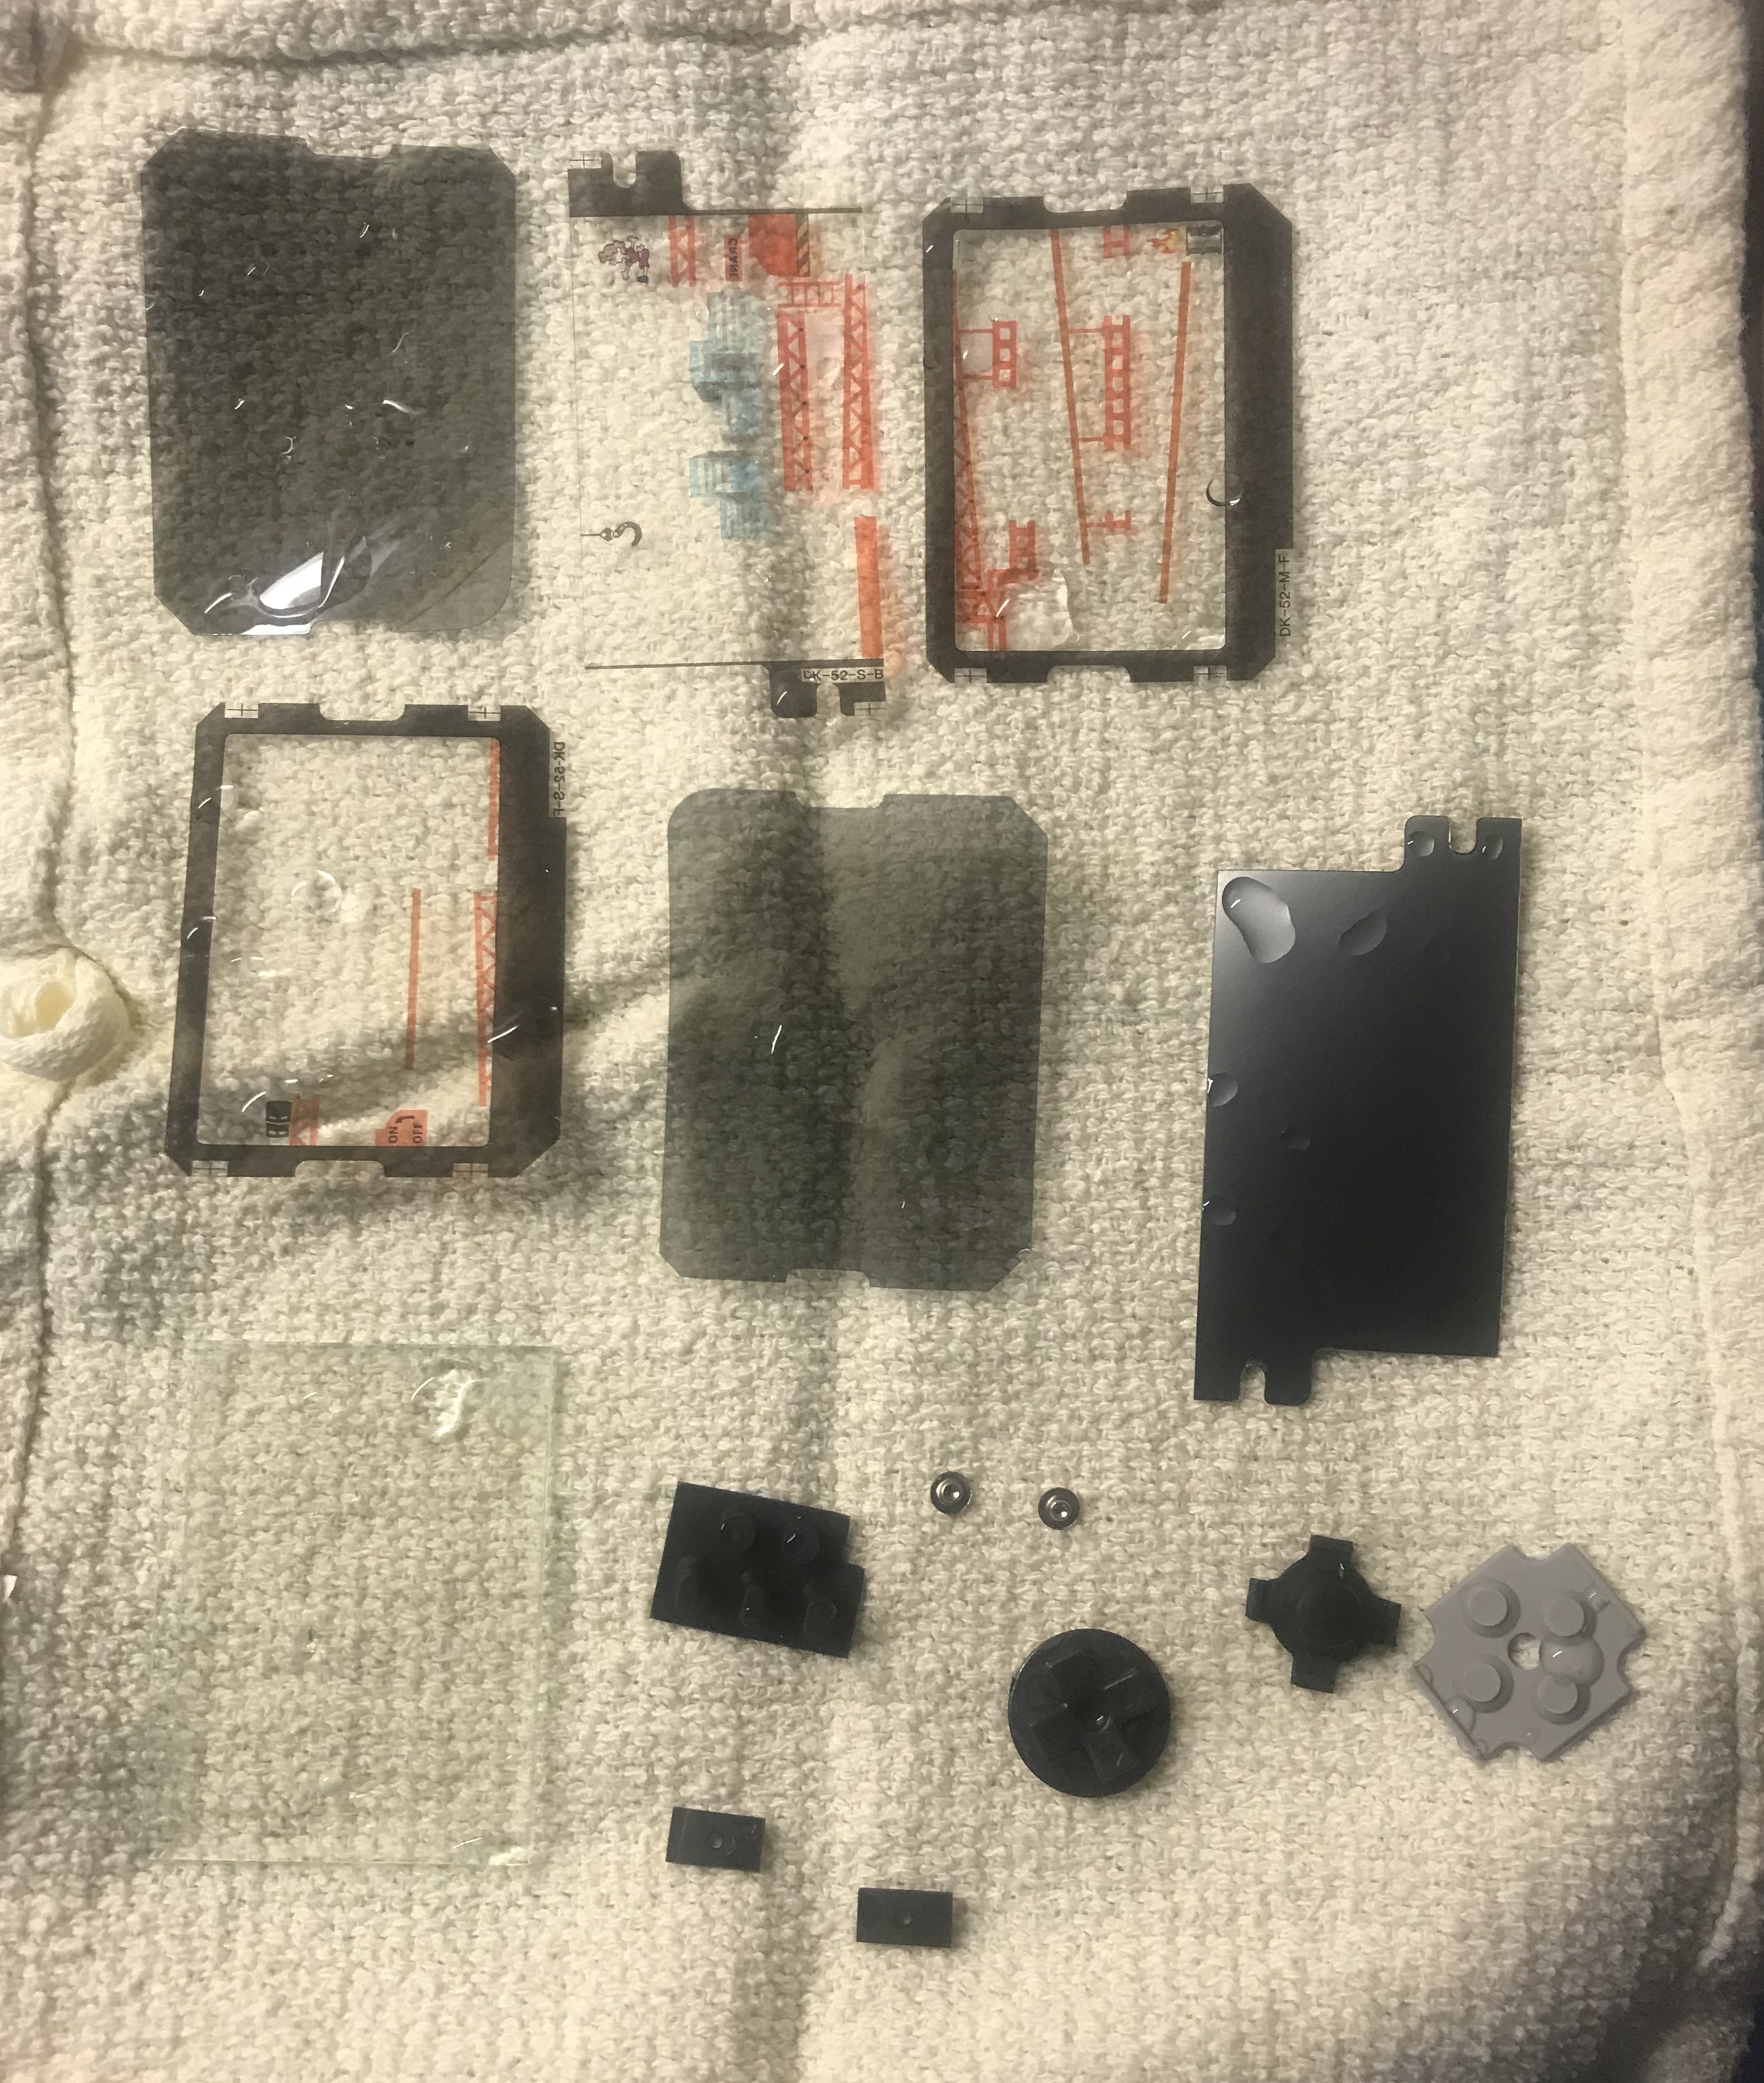
The inside of the game looked good though. All buttons and rubber pads were in good condition, they just needed some cleaning. Water and soap did wonders for the mechanical parts and screens (just don’t use too hot water on the screen parts since the thin plastic might bend). The order of the layers of the screen to remember for assembly is (from top to bottom):
Upper polarizer
Upper graphic
Glass-screen
Lower graphic
Lower polarizer
If you assemble them in the wrong order, the screen will become dark. Below are the drying parts after cleaning. It felt extra good cleaning the small metal selection buttons for alarm, since they are so tiny so people usually use a ballot pen or similar to press them, which leads to ink on them.
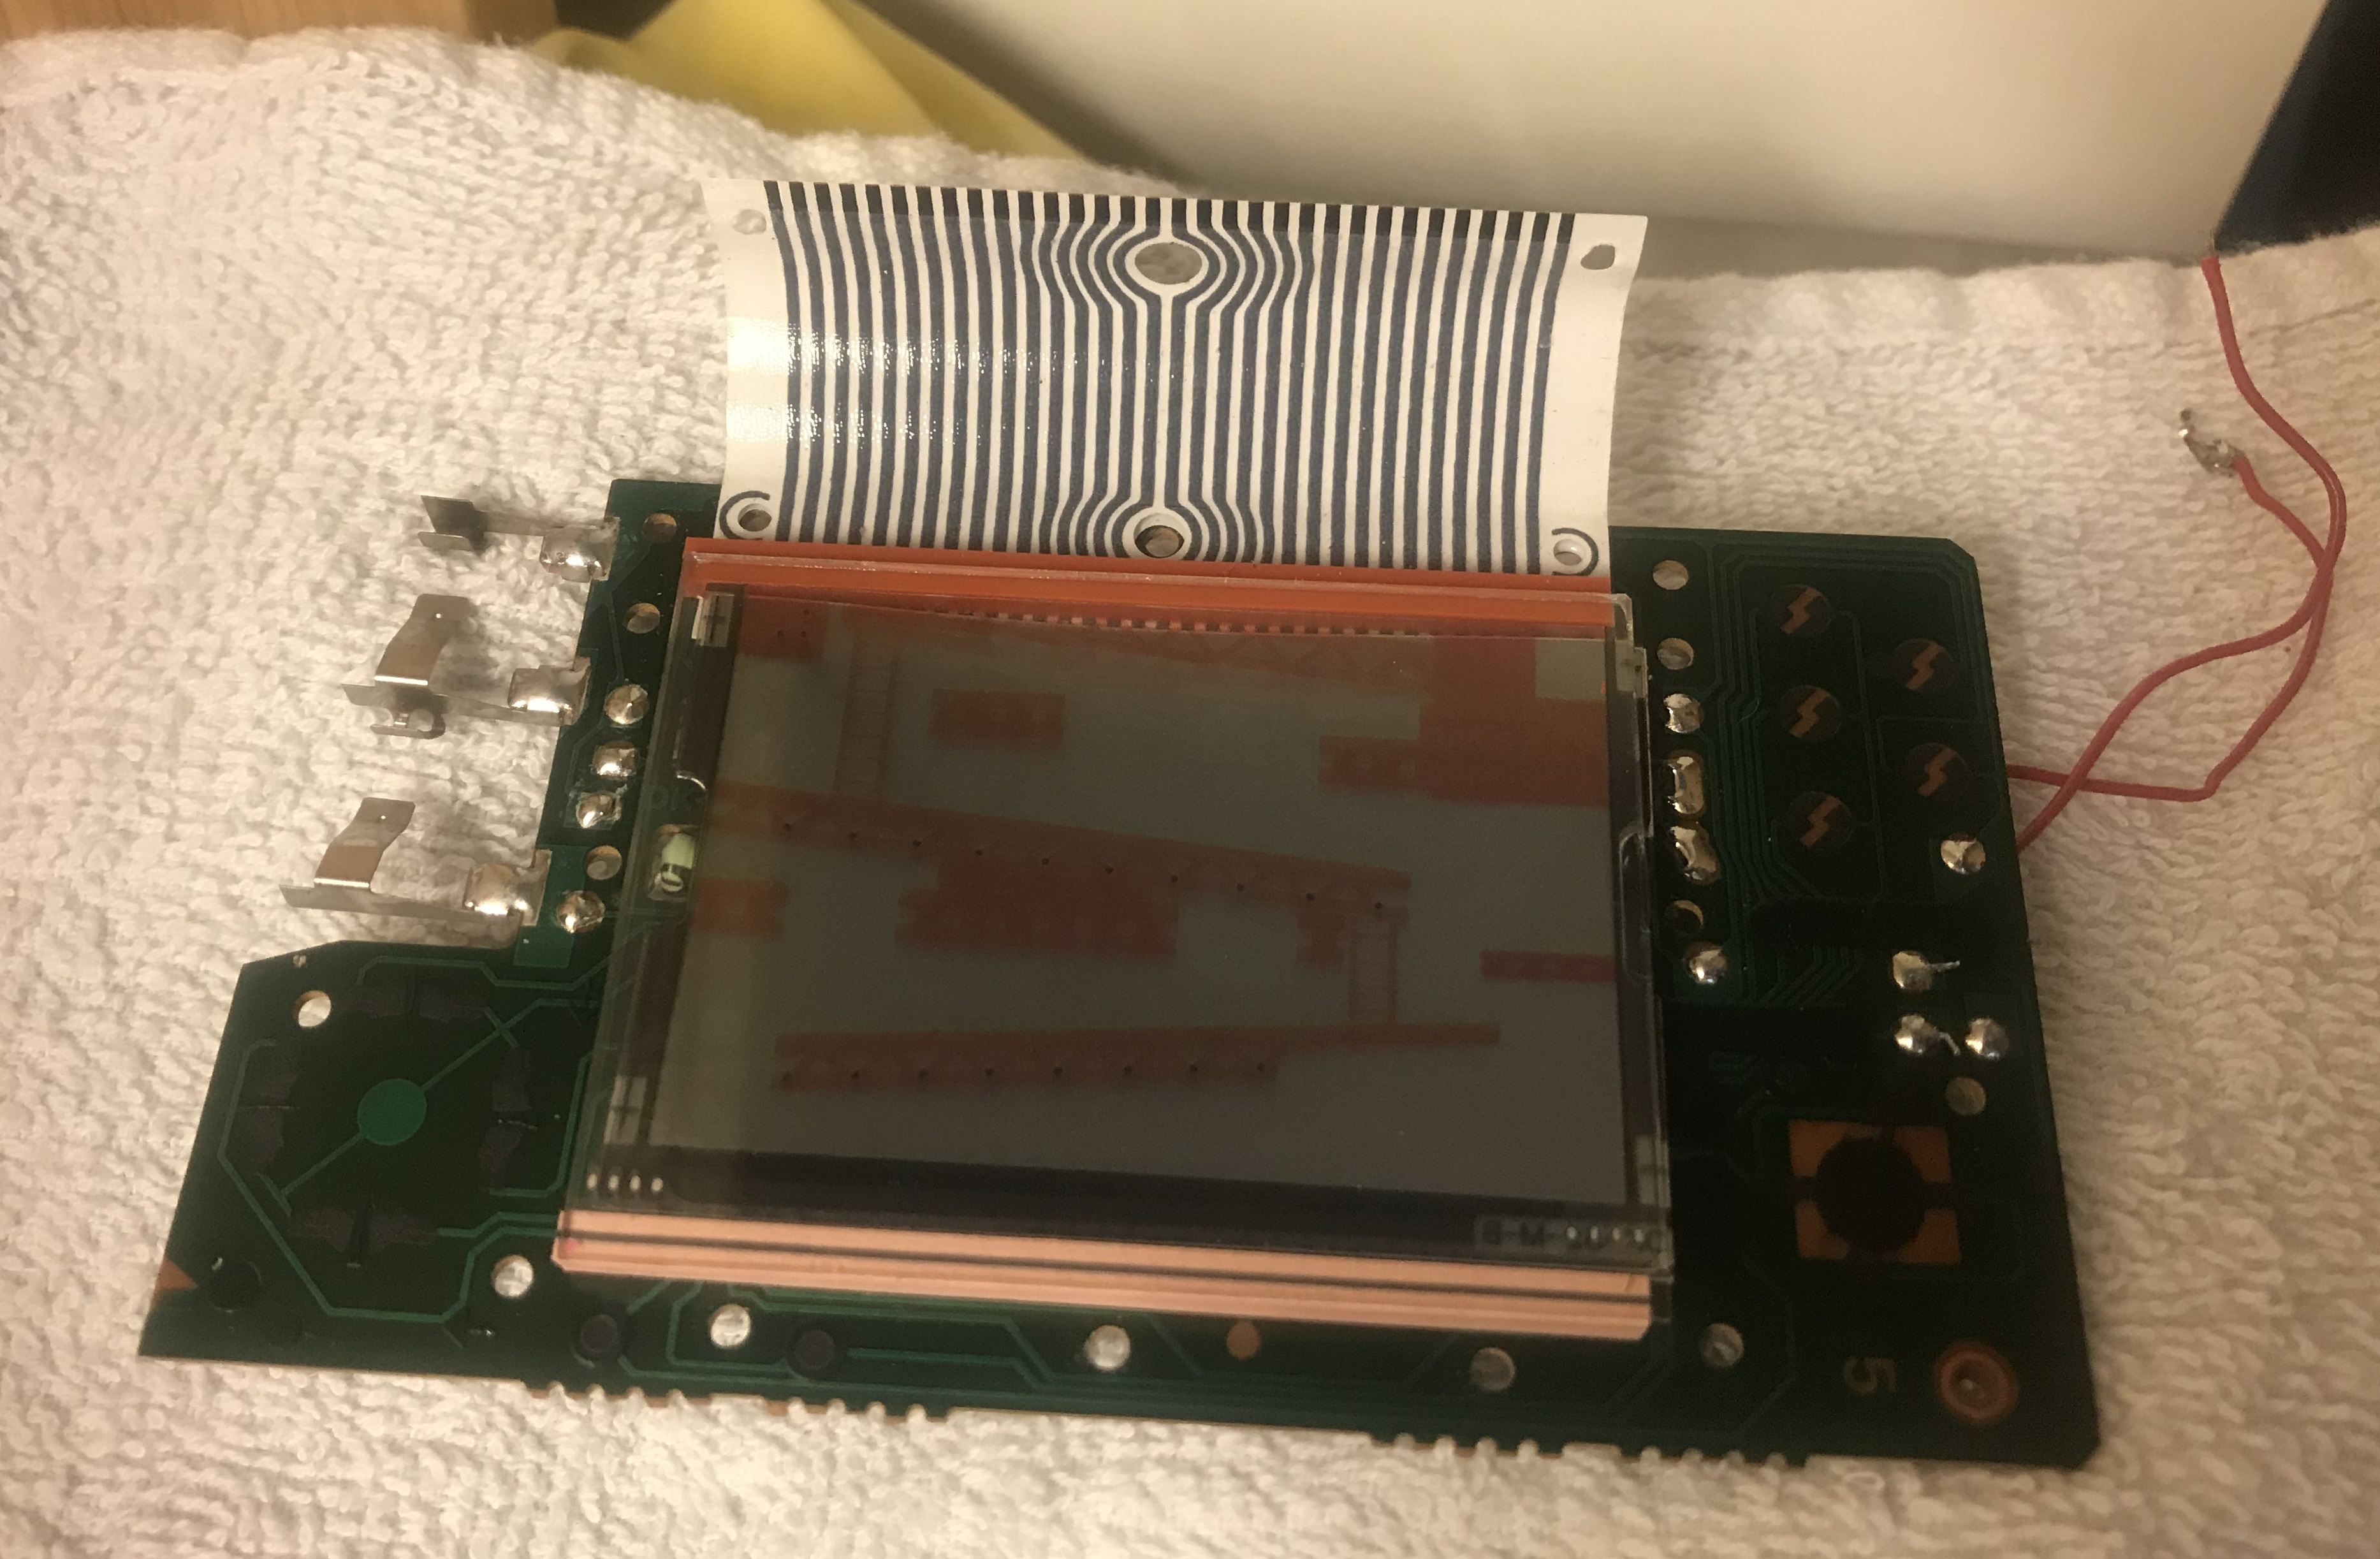
The flat cable between the screens was undamaged. It is tricky to switch, but it can be repaired with copper tape, as showed in this Youtube video.
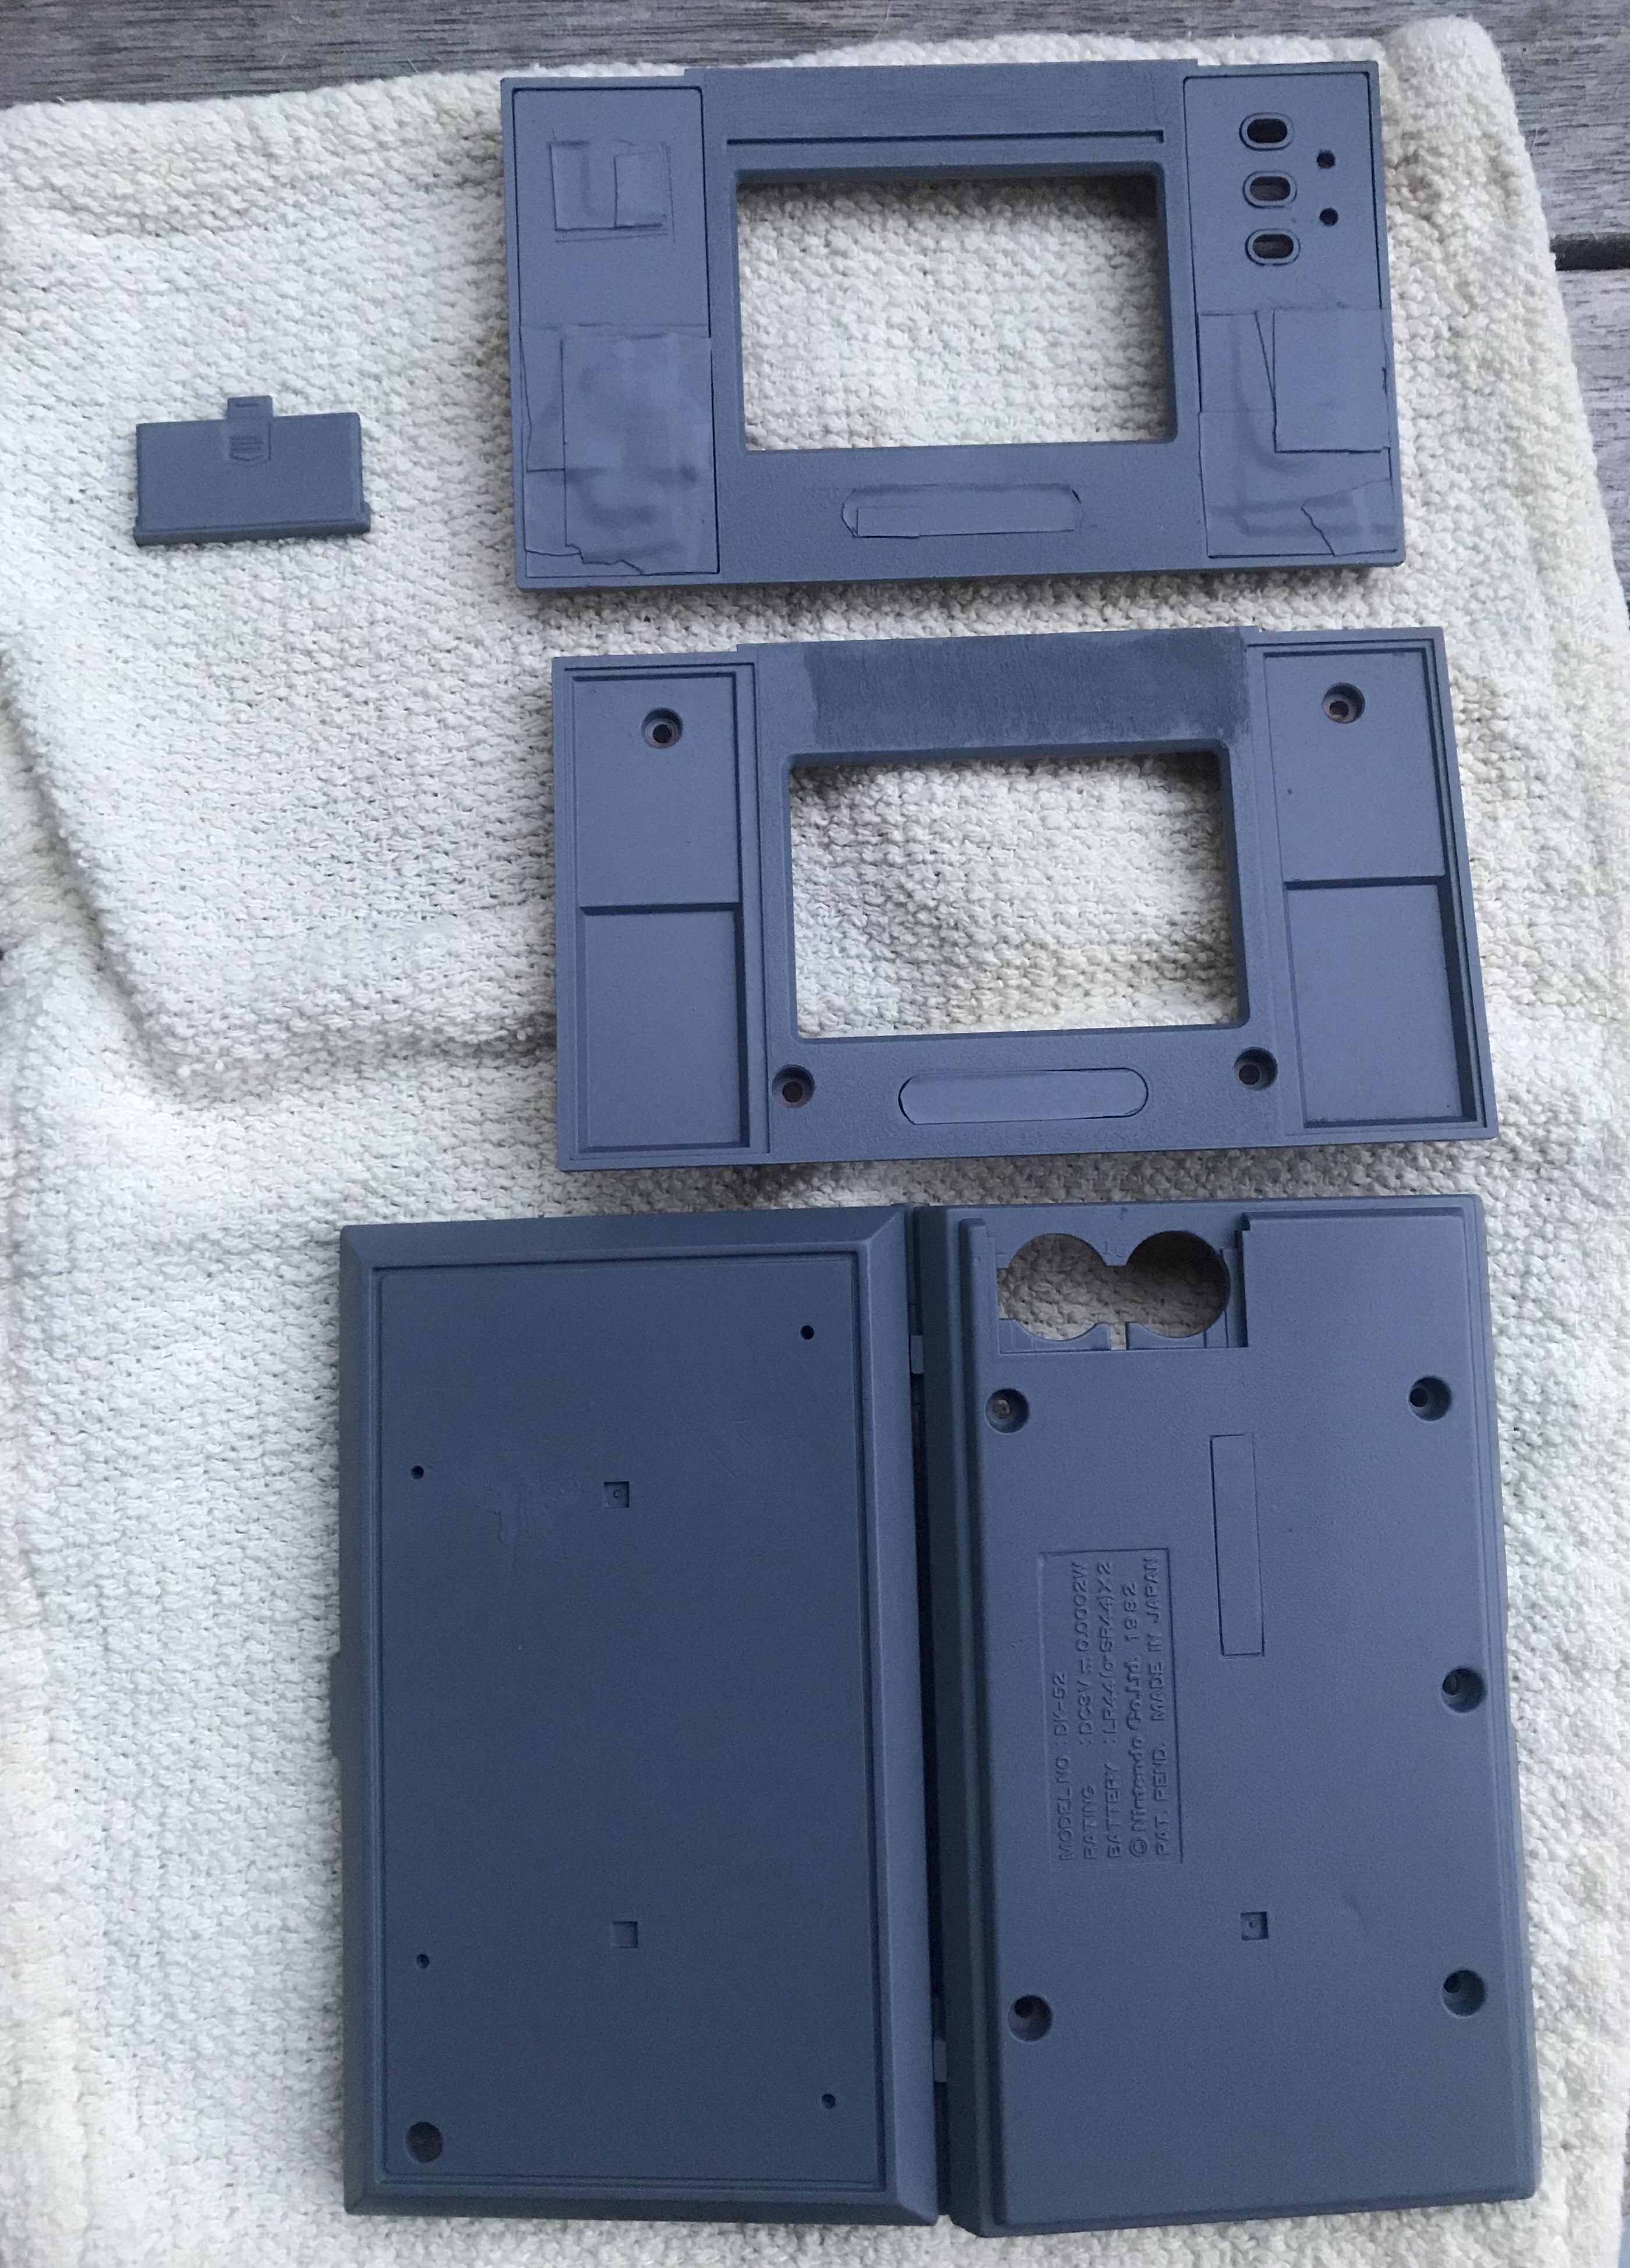
So, time for painting. First, I covered the parts which should not be painted orange. Then I primed with “Uniform Grey” from Army Painter, which I use for priming Games Workshop Blood Bowl minatures. The closest orange color I found was car paint in Swedish “Biltema”. It has a slightly lighter tint than the original Donkey Kong color and the spray is not optimal for smaller surfaces since it is a little uneven and has a tendendy to drip. It worked ok when spraying in several thin layers though. I tried to use some filler on one of the scratched surfaces. It was slightly improved, but a finer filler would probably been giving a better result.

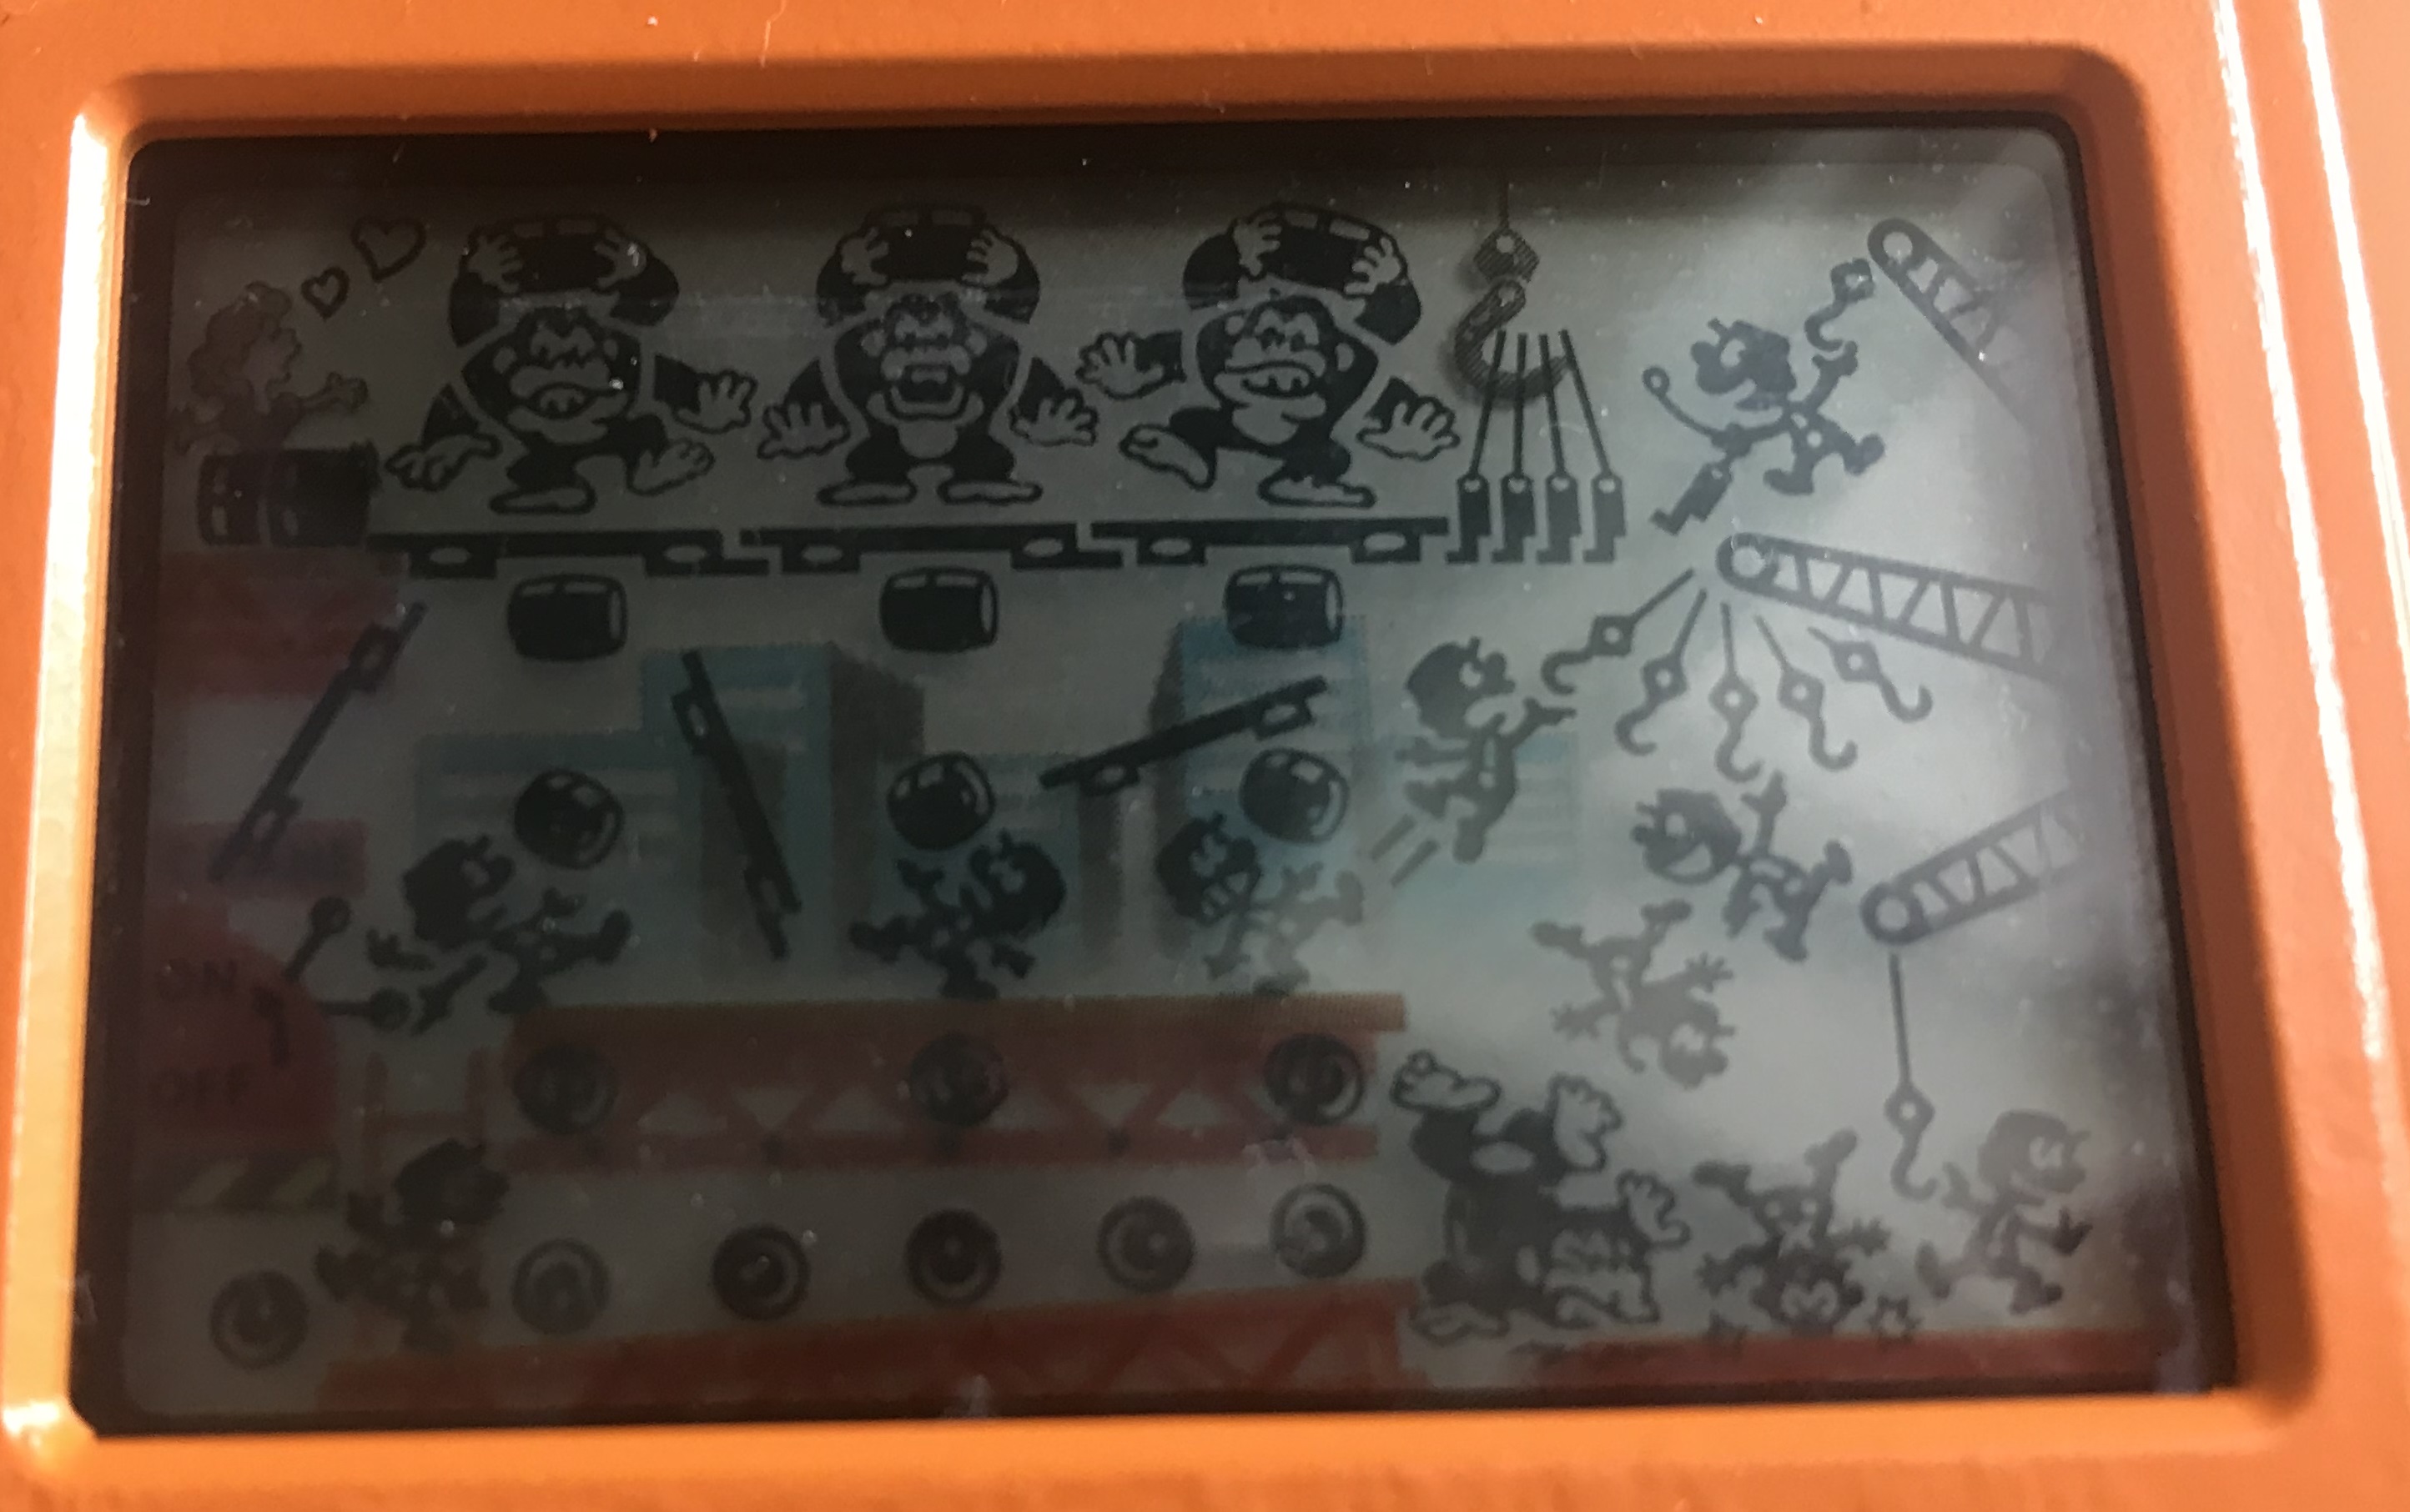
After painting, it was time to reassembly the game. Don’t forget to solder the speaker wires if you do this! Then, two LR44-batteries were inserted to make sure everything looked ok on the screens. Perfect!
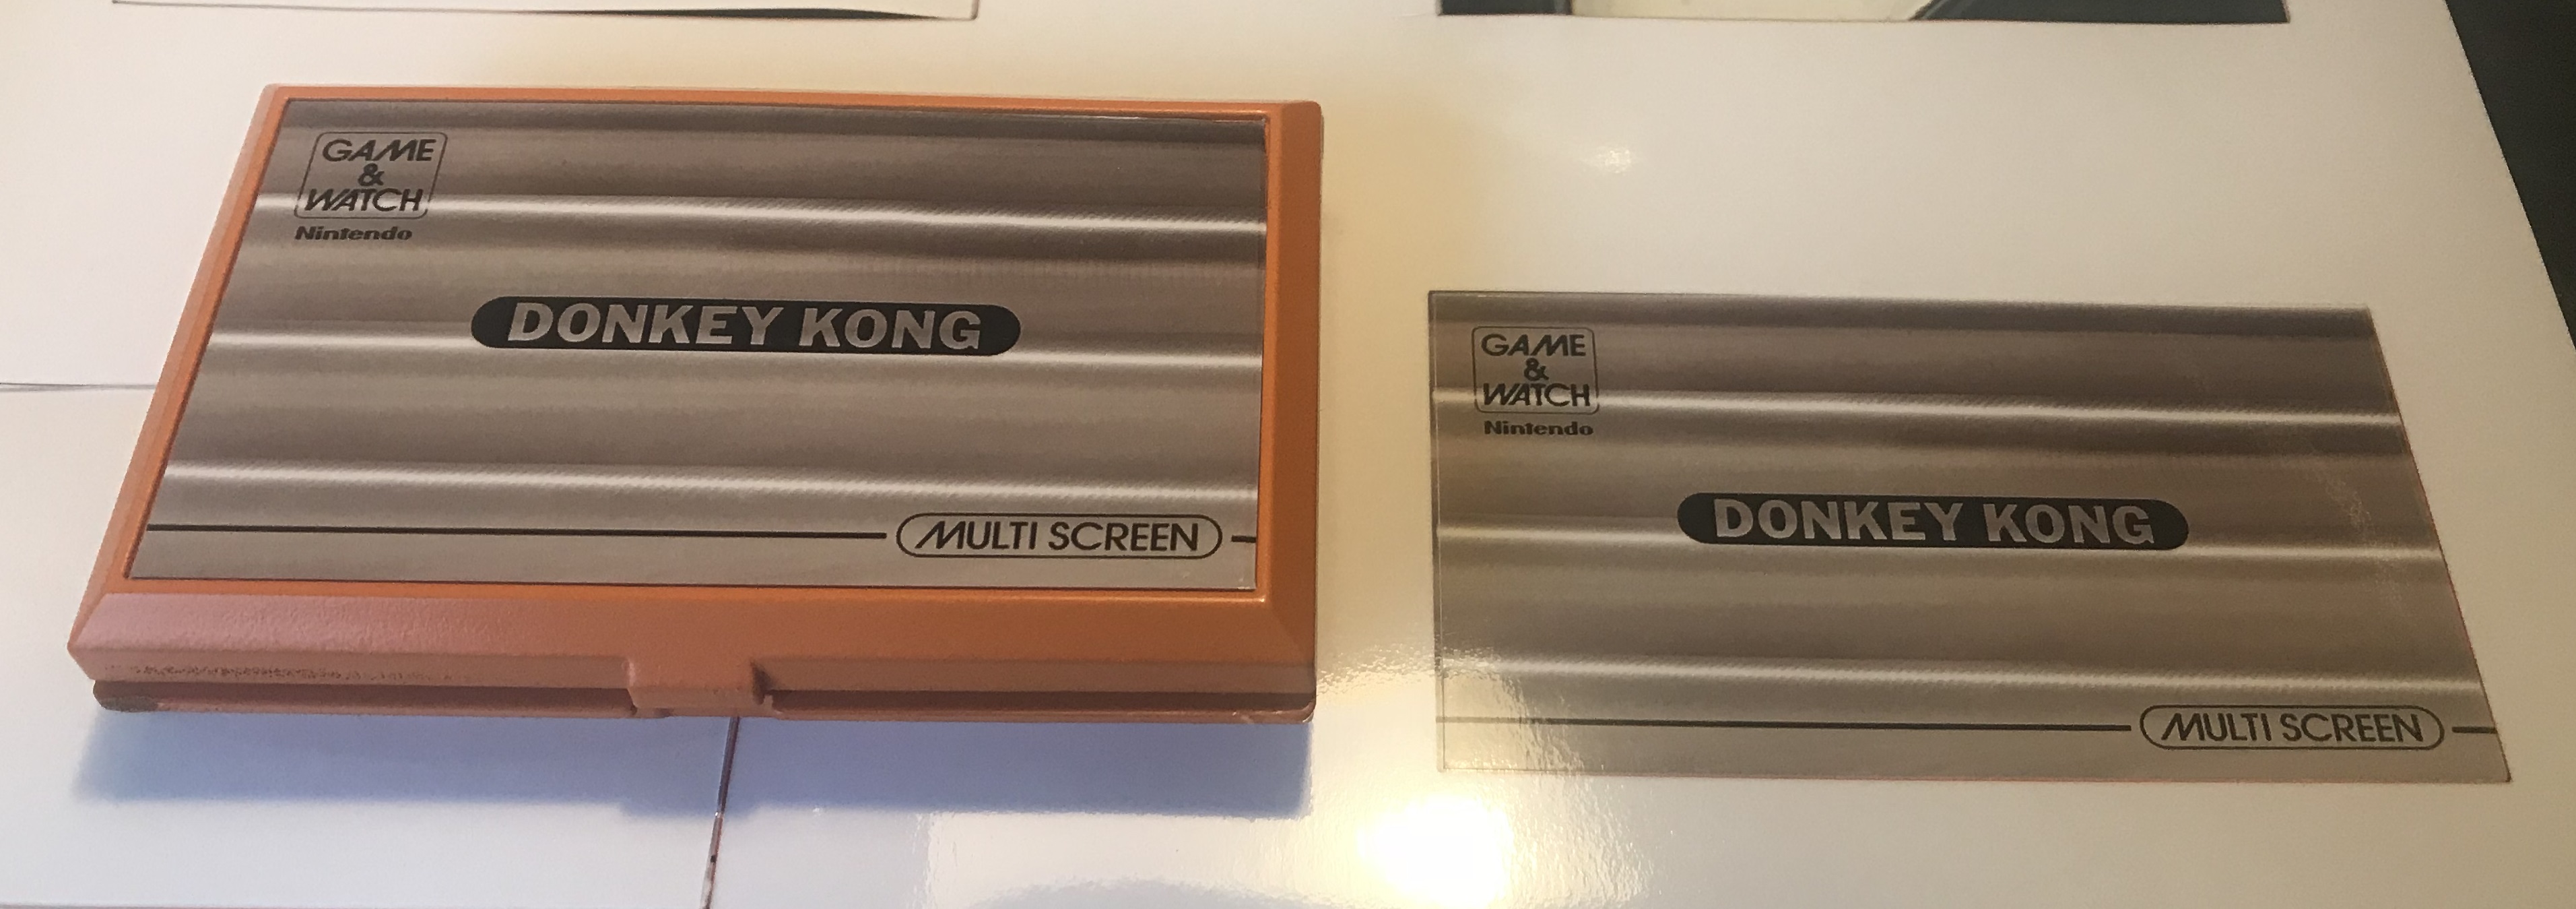
Finally, I needed a way to recreate the label at the back of the game. I found a scanned Donkey Kong game online (thank you Retro Video Gaming!). It was a bit tricky to find a business who could print tailor-made vinyl stickers (I don’t own a photo-printer), but I found a solution at stickerapp.se. Good think I ordered four stickers next to each other since the first one was accidentally placed upside down and the other failed as well. The third sticker turned out very well!
The final result below is not perfect, but far much of an improvement than the state the game was in when I received it. A few things remain before I would call it a complete success though:
- 3D-print a new battery cover.
- Some small color improvements.
- Remove color more precise from the metal surfaces.
- Find a solution for the broken plastic piece that keeps the game together when closed.
To summarize, this was a fun little project where anything basically would be an improvement from the initial state of the game when I recieved it. Sure, there is a point in keeping old games in their original state, but in this case, I believe it was the right choice to refurbish the Game & Watch Donkey Kong to a more suiting cosmetic state.
Nice work and good disassembly guide!
I am also about to restore a Donkey Kong with a missing label.
Do you still have a sticker to offer or could you please help me order the same?
BR
Matt
Hi Matt,
Thank you! 🙂 For the sticker I used https://www.dreamcast.nu/wp-content/uploads/2018/08/Donkey-Kong-large-sticker.jpg. I placed four copies of the image on an A4, and placed the order at http://stickerapp.se/. I have one spare from last summer which I can send you, although it is a bit risky just to have one sticker, since it is a little tricky to cut and align it.
//Leif
Hi Leif,
I would love to buy the last sticker from you:D
If I mess it up I will go ahead and order 4 new ones like you recommend!
If I’m successful, though, I will play the lotto at the same time;)
BR
Matt
Mail me your address and I’ll just send it to you 🙂
Sorry can u help to find what i choose on stickerapp.se
I really need this label for my donkeykong too.
Hi all,
Anyone have a link to find the Donkey Kong silicone contact control pad?
Thanks
wow, pretty cool. I have the donkey konk 2, but the ink may have dried up , since I cant see the characters but can hear sound. Any suggestions on refurbishing this classic.
The problem might be caused due to faulty polarize filters, which have to be replaced. If there is no picture at all I would suggest opening the game and carefully inspect the electronics for any damage, including the white ribbon cable. I saw a video of a guy repairing this cable with a piece of flexible flat copper wire on Youtube.
Which material did you use on stickerapp? Brushed aluminum?
Vinyl.
Hi friend,
I need to print the main cover sticker, did you reproduce with silver vinyl the effect?
The sticker is printed on vinyl yes. I used an image, which I sent to a firm that did the printing for me.
Hi thank you for posting your project!! It was really fascinating!!
Question how did you go about having a new battery cover 3D printed. I have an Altic La Grande Route LCD game with no battery cover.
Thank you for your help!
Best, Will
Hi, thanks! I downloaded a model from Thingiverse: https://www.thingiverse.com/thing:2149015, then I went to the local library and printed it. The tiny tab that holds the battery cover in place is a bit tricky to print, so it might require a few adjustments in printer settings. Plenty of covers on eBay though, for those who don’t want to 3D print.
Great refurb. Did you manage to find a way to repair the latch, as I have the exact issue with mine?
Thanks! Regarding the latch: I could 3d-print a piece of plastic to replace it, but I do not think glue would be strong enough to hold it in place when opening and closing the case sadly. I’ll let you know if I come up with a sustainable solution.
For the little tab that keeps it shut, I would recommend 3D printing a complete tab, cutting it down to the size needed, and then JB-Weld to stick it on. It is a far stronger solution to most superglues. JB-Weld is fairly cheap, has enough flex in it to allow it to snap shut, but is FAR stronger than superglue. It has steel dust in it, hence the name.
I think this solution could work. I usually use a product similar to JB-Weld (“Chemical Metal”) for the kind of jobs where the parts are put under a high degree of stress (see, e.g. https://www.dreamcast.nu/en/compaq-contura-420c-laptop-hinge-repair/).
Ah yes, I have used that stuff, it works well for filling cracks in Aluminium car bodywork (rebuilding one). I wouldn’t *really* recommend it for plastic parts, but if that’s what you have on hand, go for it mate. Glad to see another one in good nick.
i’ve actually used a similar way to repair my own DK-52. I made an aluminium tab to match the top panel and filed a notch in it. It works fine.
Is there any way you could post a scan of the label that says “game and watch” that goes over the d-pad? I’m thinking a high res photo should work, than maybe I could edit it.
Hi, the logo on my G&W is a bit scratched as seen in the images. I tried to take a good picture with my phone, but it kept catching light reflections. My scanner is in the storage area. However! Another method may be to merge a couple of images. A) Google image for “silver metal background B) Grab a G&W logo from somewhere e.g. here: https://www.behance.net/gallery/69688871/40-Game-Watch-Logos-Fully-Remastered C) Use the image from a as a background layer in Photoshop or Paint.net. The result should look something like this: https://www.dreamcast.nu/wp-content/uploads/2021/01/Game-Watch-Logo-Silver.png
Great project! I’m looking to replace the sticker on the same unit. Do you happen to recall the dimensions of the sticker as I’d like to order a replacement myself! Thanks!
Thanks! The sticker is approximately 10.4 x 5.8 cm.
Great job! I also need to replace my silver front sticker. I got in touch with the swedish company you mentioned. Did you get a regular sticker (thin like paper) or a thicker more alu plate like the original front on the game?
Thanks! If I recall correctly I used their self adhesive vinyl sticker option.
Hey – great work.
Did you ever get the the piece fixed to keep the game closed ?
Thank you! Sadly I have not been able to find a good solution to fix the plastic piece that holds the game together. The piece is put under a lot of stress when opening and closing the game which makes it hard to create a resilient solution.
OK – thanks for getting ack to me – wonder if a PLA 3D print would work – it’s a bit flexible but still pretty tough…..
Maybe, if it is built so it does not get subjected to that much stress, and properly attached to the tiny surface where the old part was seated.
Is there anyone that makes the replacement glass LCD screen for the various games, turtle bridge, chef, octopus etc etc
I have ‘screen bleed’ where the liquid crystal has bled out and have black blotches on the screen
Sadly not. I have not seen any viable solution to the black blotches on the LCD screens.
Ive just inherited one of these, there is some bleeding on the screen and whilst it turns on, you can only see what’s going on if you tilt it. otherwise it’s in incredible condition. Is this fixable and in its condition, is it worth anything?
Sadly the bleeding on the screen is not fixable. Regarding value, check eBay. Depends on condition, if it comes with box / manual etc.