Dreamcast disassembly
On this page we will take a look inside the Dreamcast, and changes CMOS battery and doing some cleaning. I bought a presumed broken unit (PAL) on Swedish eBay, that did not spin discs and had no video or sound. The troubleshooting became easier than expected. Follow the steps below to disassembly your Dreamcast. You only new one or a couple of Philips screwdrivers.
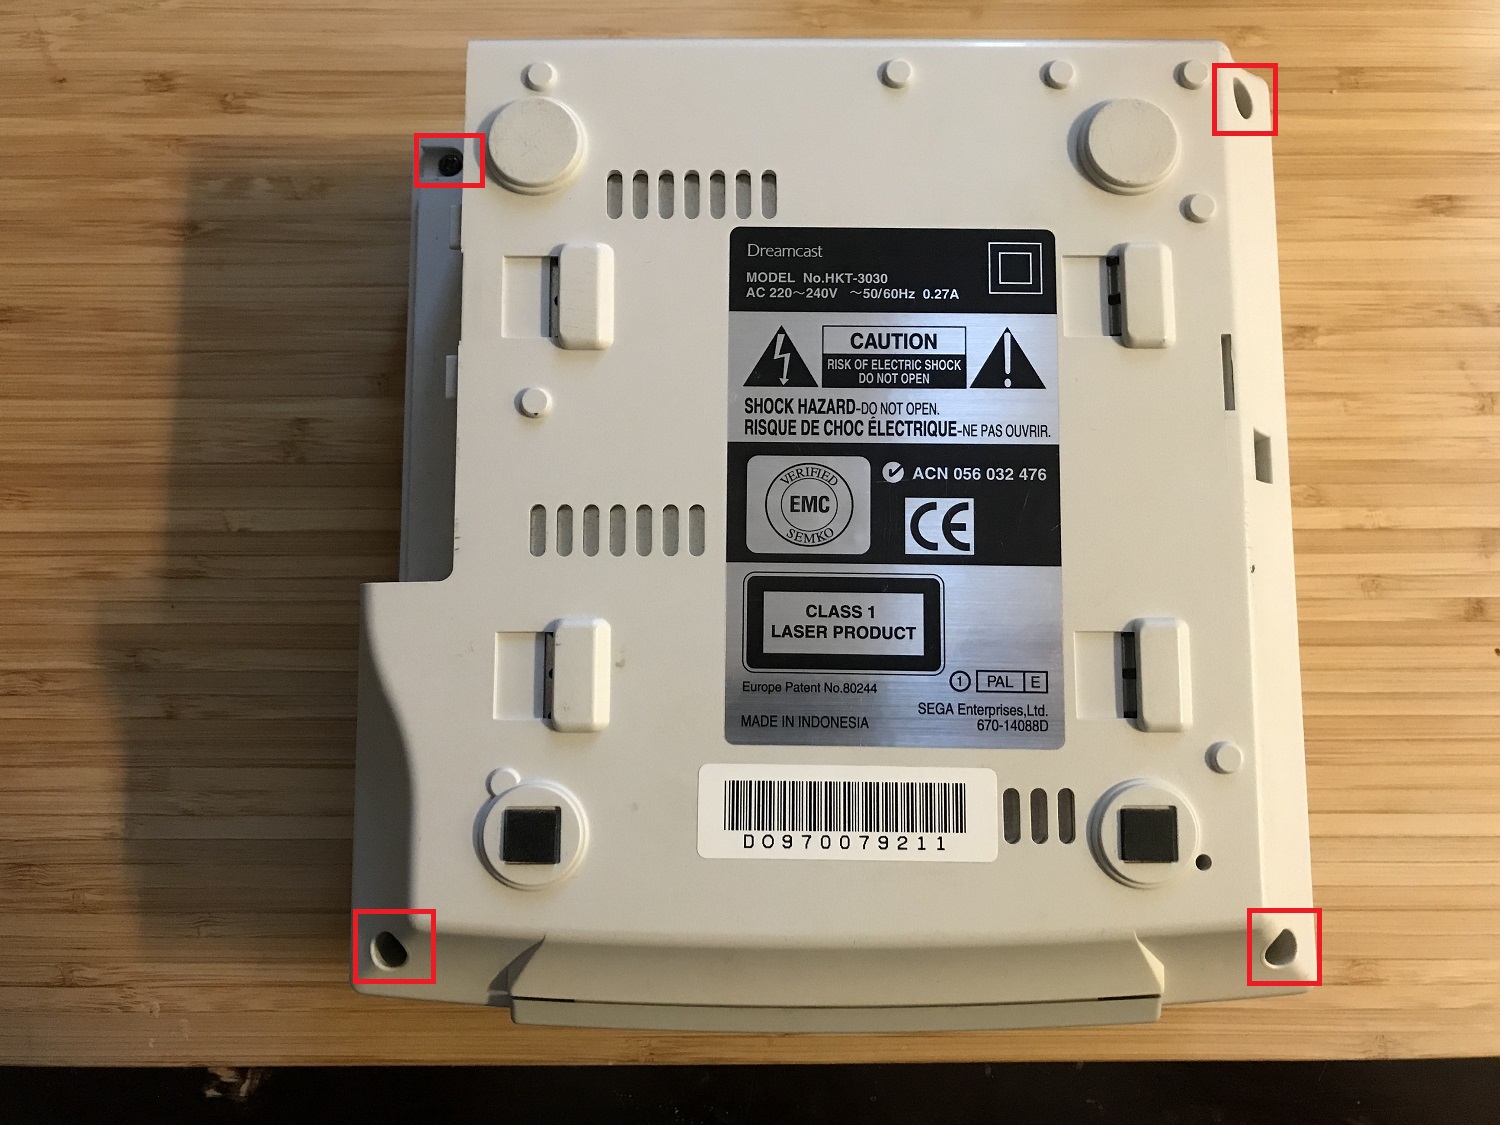
Step 1: Remove the modem and unscrew the four marked screws on the bottom of the unit. Lift off the top.
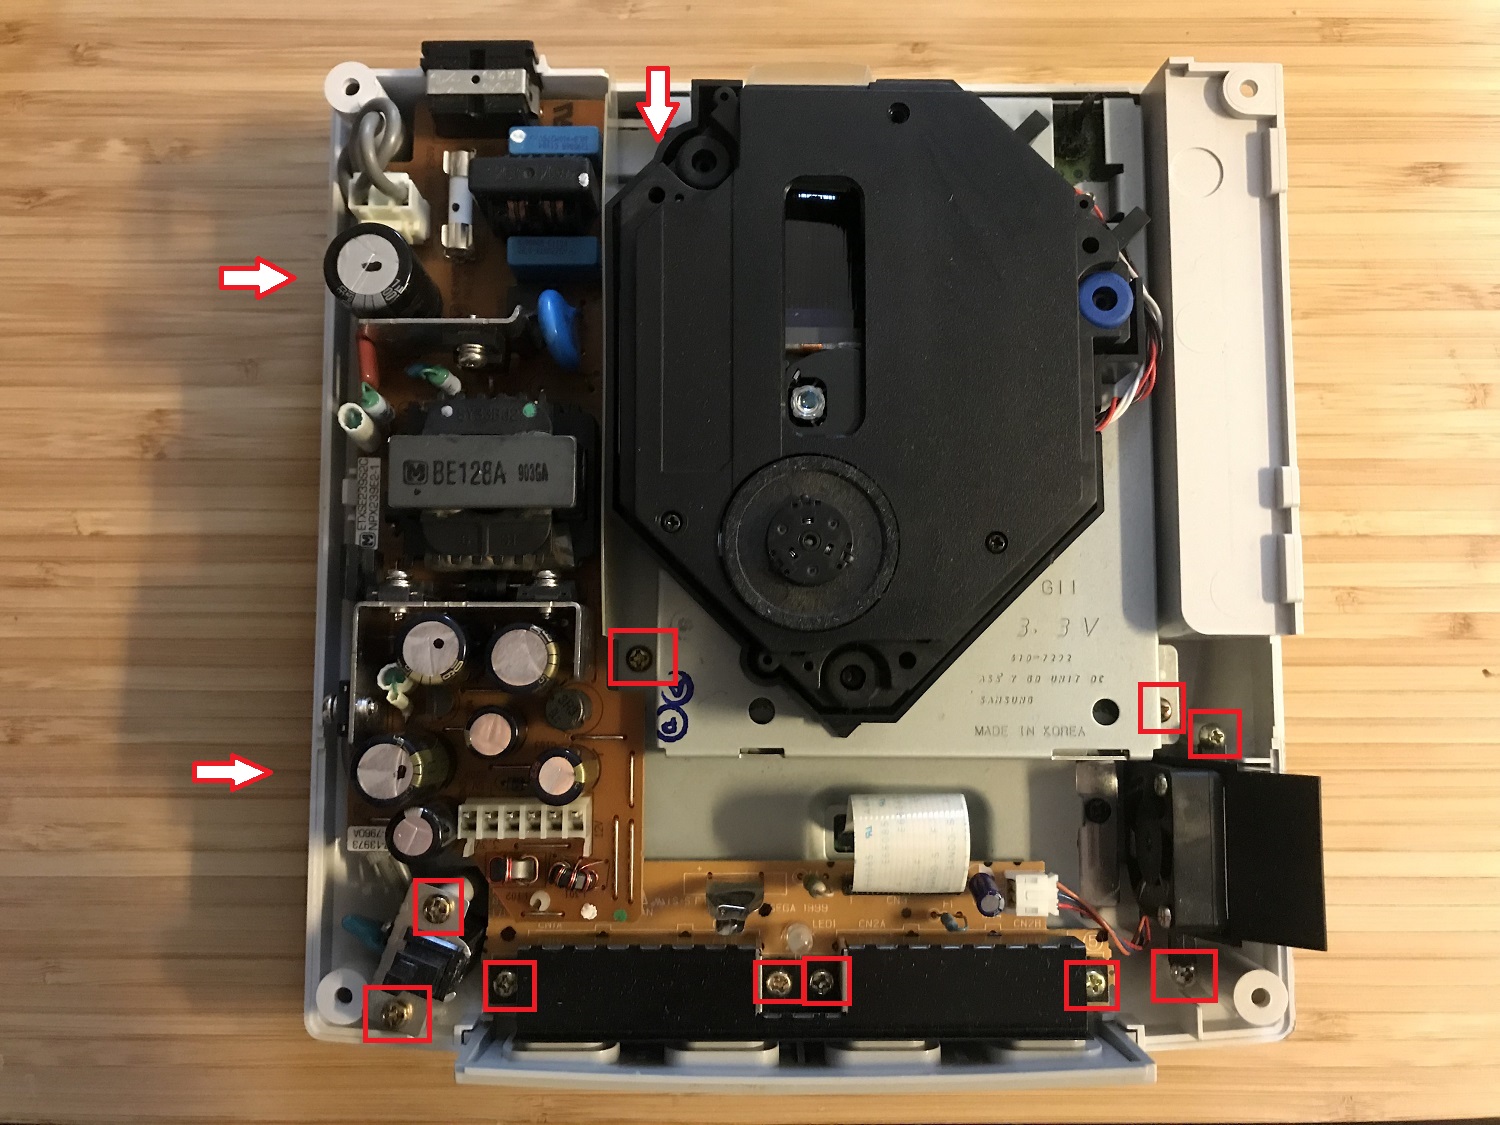
Step 2: This is the inside of the Dreamcast. The power unit is to the left. To the right of it is the laser unit. At the bottom the joystick ports reside, and to the right is the fan. Below everything is the mother board, which we will acess. Remove the power unit first, then the joystick ports. If you want to remove the fan you can remove that one as well. Finally, remove the laser unit. Screws that are hidden in the image are marked with arrows. Do you find anything missing in the below image? The CMOS-battery that is supposed to reside above the joystick ports were missing for some reason! This was the major fault with this unit!
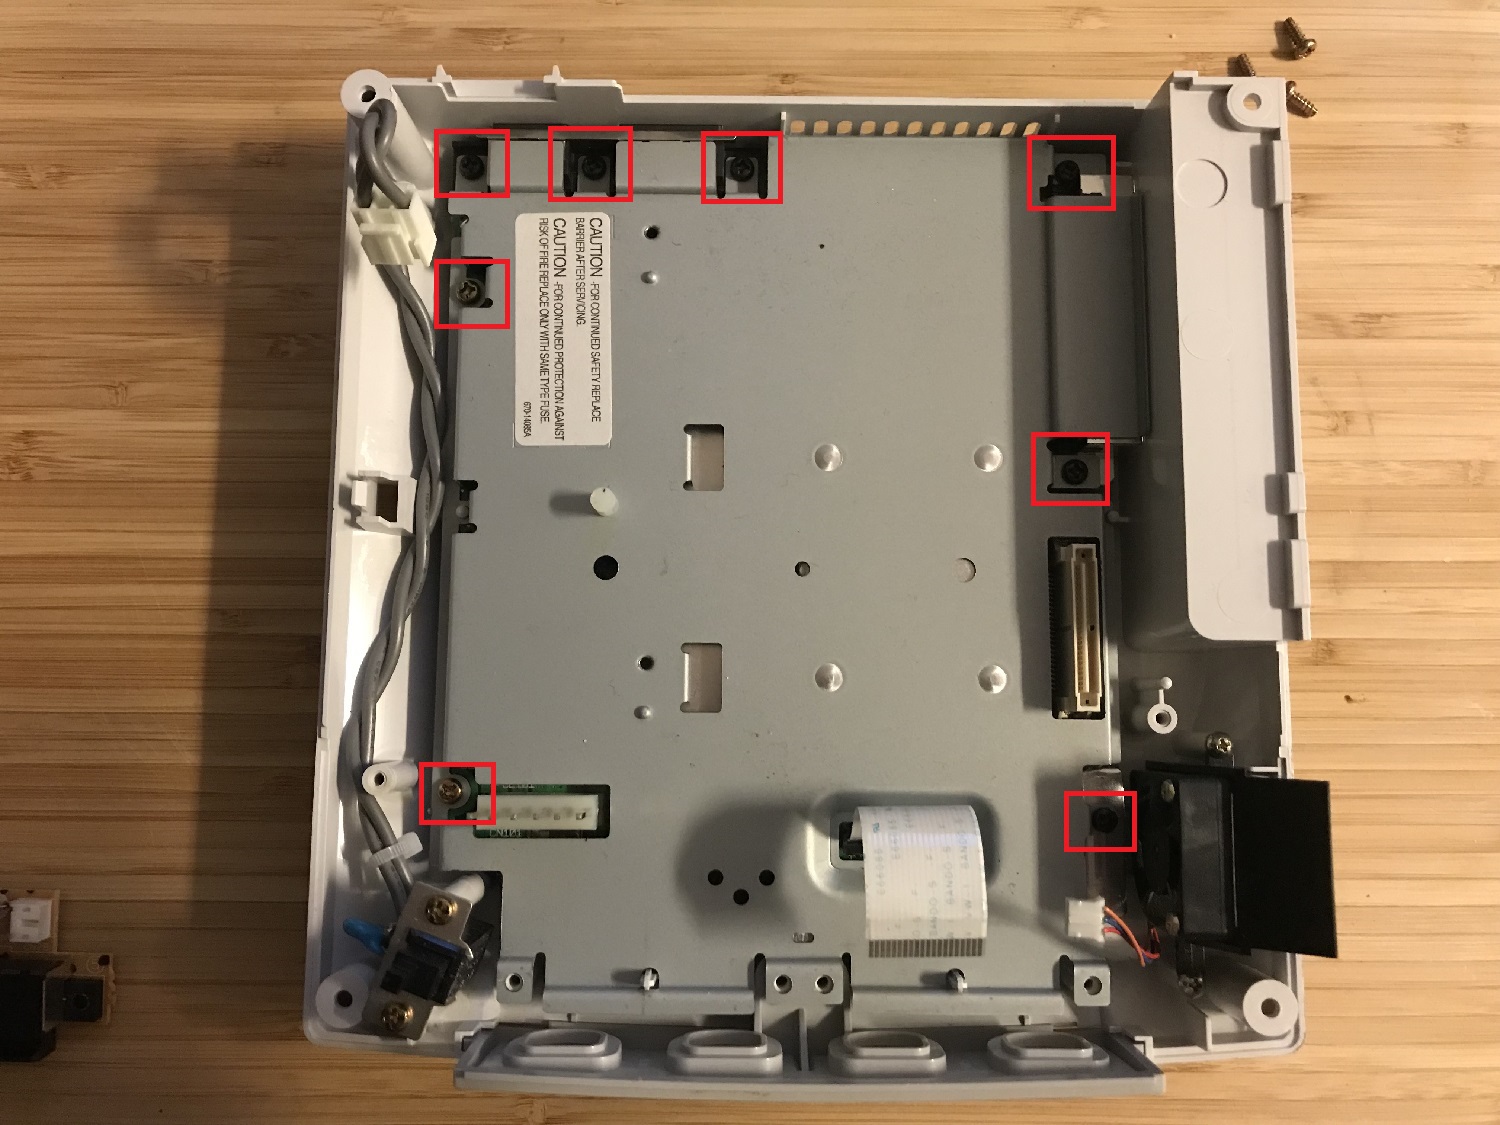
Step 3: Remove these eight screws to access the mother board. Notice the white metal sticks rising down to the left! A common error is that the Dreamcast reboots randomly, due to these metal sticks being dirty or oxidized. Clean them with alkohol and that problem is solved!
Step 4: If your Dreamcast asks you to set date and time when you turn it on, the reason is that your cmos-battery is depleted. To replace it, simply desolder the old battery together with its holder. It is a good idea to replace the holder to a new variant, which enables solder-free battery replacement. These holders may be found in any electronics shop, or on eBay.
The battery can be replaced with a a CR2032 3V battery, if you also install a diode to prevent the Dreamcast from trying to recharge the battery (see link below). Now is also a good time to replace the F1 fuse if one or more of your controller ports are faulty (see: Dreamcast controller port repair).

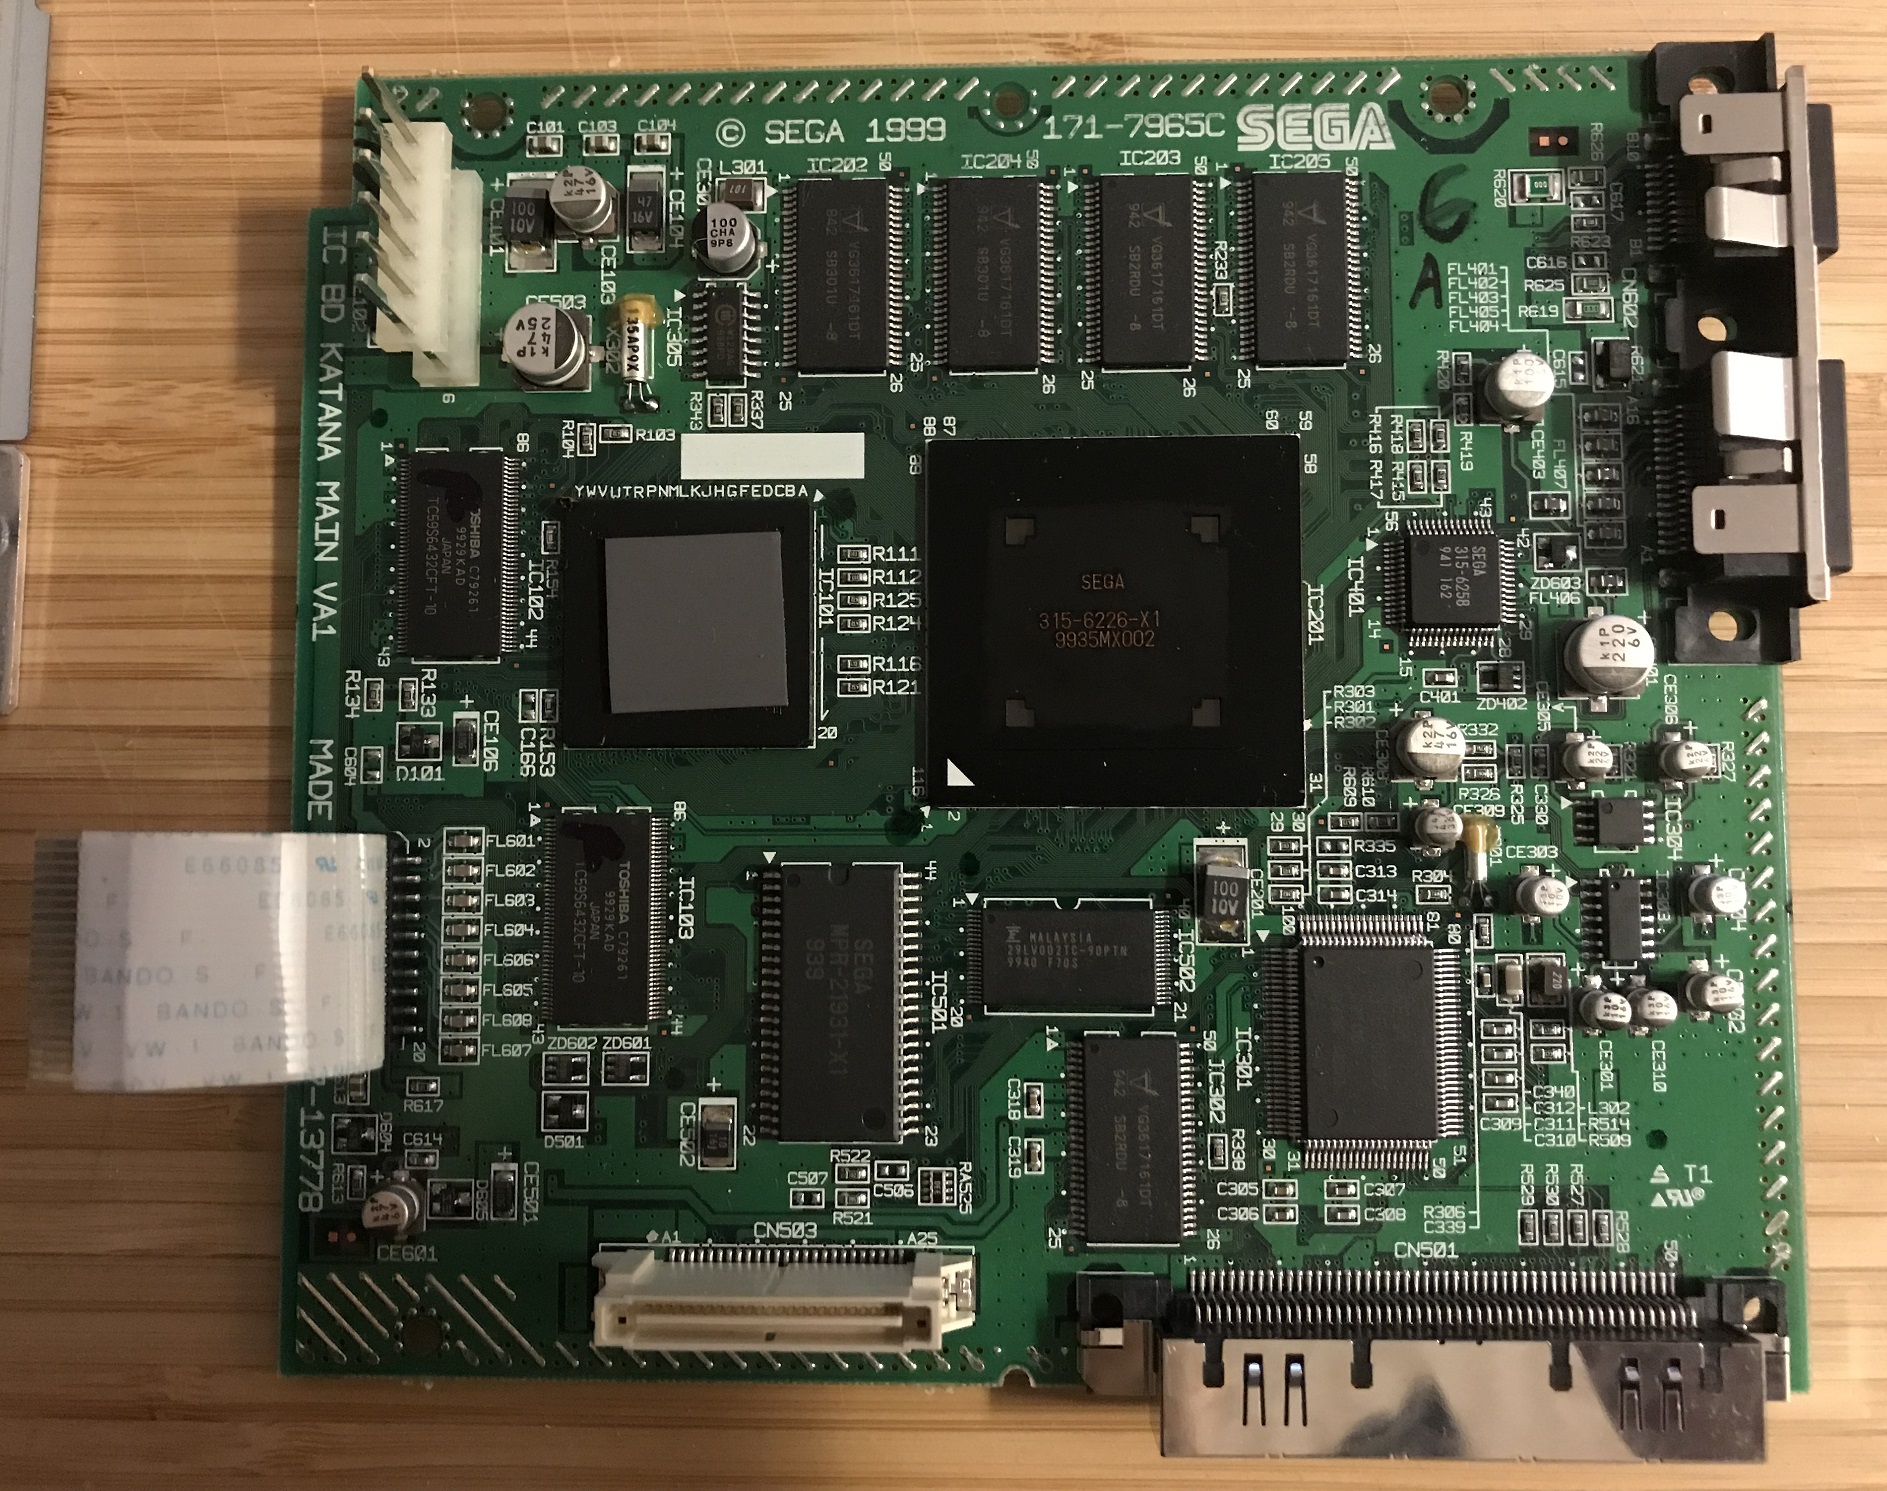
Step 5: Done! This is the motherboard of the Dreamcast. The text to the left reveal that it is a model VA1, which is quite common. I sprayed some electronic cleaning solvent in all contact surfaces. This unit was very clean, unlike the Gamecube I worked on the other day. Assemble your Dreamcast in reverse order!